Configure a tag
In this microlearning, we will focus on learning how to configure a tag.
Configuring the tag itself is relatively simple. Using tagging to create different views is the art.
Should you have any questions, please contact academy@emagiz.com.
1. Prerequisites
- Basic knowledge of the eMagiz platform
2. Key concepts
This microlearning centers around configuring a tag.
With configuration we mean: Adding, Editing, and/or Deleting a tag
With tag we mean: A label under which you can group a set of systems and/or integrations
3. Configure a tag
As specified before with configure we mean adding, editing, and/or deleting a tag. Below we will detail per action what you should do.
3.1 Adding a tag
Adding a tag can be done in three distinctive ways.
3.1.1 Adding a tag on system level
When you double click on a system (or edit the system via the context menu) the detailed information of that system will appear.
Furthermore, a segment related to Tags will be shown in the pop-up.
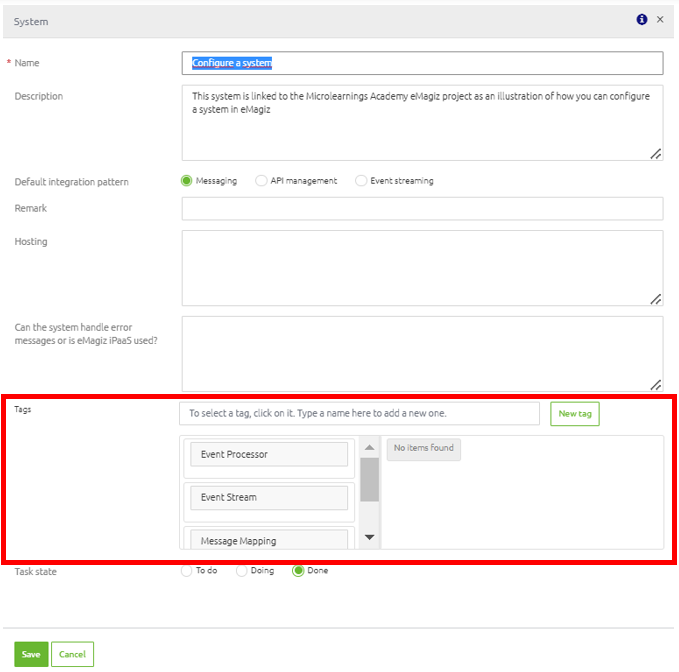
Here you can create a new tag by typing in the name next to the tags label. After you are done with writing out the name select the button New tag

By adding a tag this way you also directly link it to the system you are currently editing

If you want to deselect a certain tag on the system level you can select the x icon to the right of the tag to make sure this system is not tagged anymore.

3.1.2 Adding a tag on integration level
When you double click on integration (or edit the integration via the context menu) the detailed information for that integration will appear.
Furthermore, a segment related to Tags will be shown in the pop-up.
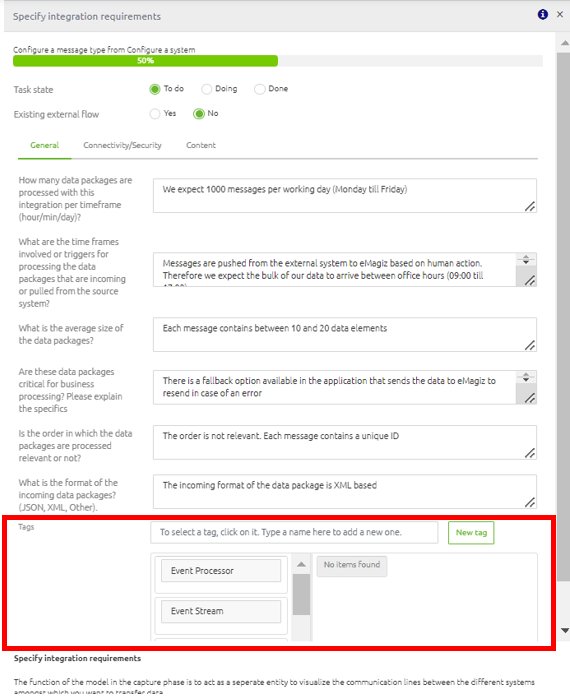
Here you can create a new tag by typing in the name next to the tags label. After you are done with writing out the name select the button New tag

By adding a tag this way you also directly link it to the integration you are currently editing

If you want to deselect a certain tag on the integration level you can select the x icon to the right of the tag to make sure this integration is not tagged anymore.

3.1.3 Adding a tag on capture level
Apart from adding a tag on the system and/or integration level, you can also add a tag via Capture -> Settings -> Tags.
In this overview, you can press the New button to add a New tag.
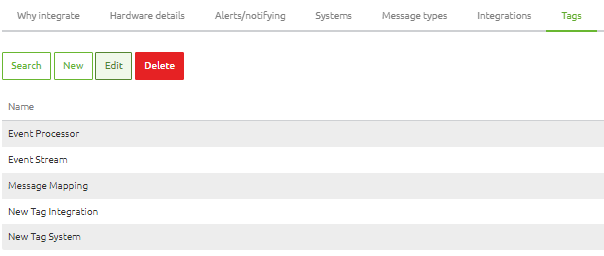
Adding a tag in this way makes sure the tag is linked to your project but not yet applied on any system and/or integration

However, you do have the possibility to link systems and integrations to this newly created tag in the same pop-up
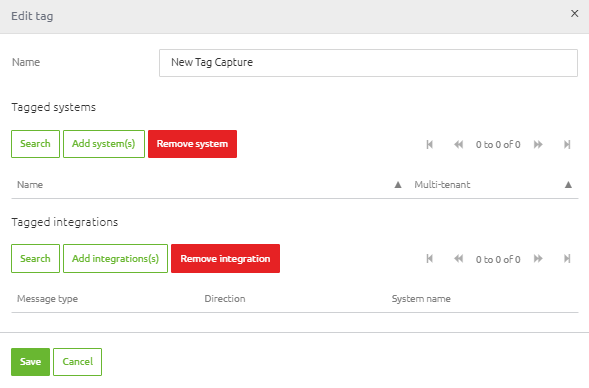
The best practice when it comes to adding tags is to add them via the system or integration option as that is the contextual level for which you want to utilize the tags.
3.2 Editing a tag
Editing a tag can mean two things:
- Edit the name of the tag
- Edit which systems and integrations the tag is assigned to
Both are discussed below in more detail
3.2.1 Edit the name of the tag
To edit the name of a tag you navigate to Capture -> Settings -> Tags. Here you can search for the tag, select it and edit it.

In the pop-up that you will be presented with you can simply edit the name of the tag and press Close.
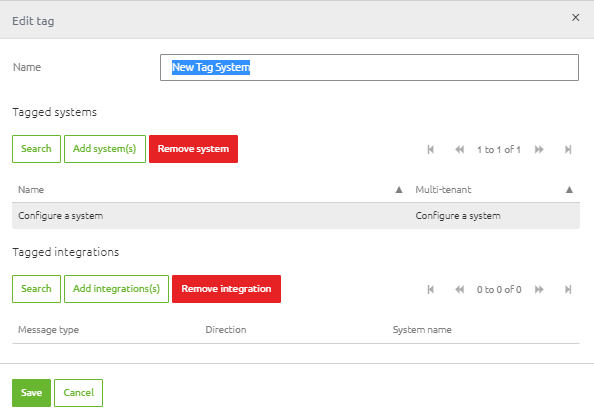
3.2.1 Edit which systems and integrations the tag is assigned to
You can either add or remove system(s) and integration(s) via the pop-up we have just discussed
or you can select the system or integration you want the tag to be added or removed from via the Capture overview page.
In the second case, you look for the tag you want to add or remove and click on it to add or remove it.
3.3 Deleting a tag
To delete the name of a tag you navigate to Capture -> Settings -> Tags. Here you can search for the tag, select it and delete it.

After reading the confirmation popup press OK to remove the tag from your project.

4. Key takeaways
- You can link a tag to integration or a system
- Editing and deleting tags can be done via an overview under Capture -> Settings
- Best practice is to use the system and/or integration as the starting point for adding and removing tags
5. Suggested Additional Readings
If you are interested in this topic and want more information on it please read the help text provided by eMagiz.