Property Management
In this microlearning, we'll dive into the essentials of property management within the eMagiz platform. You’ll learn how to create, edit, and delete properties based on evolving needs, such as updates or new releases. We’ll walk through the different methods for managing properties and how to use the eMagiz tools effectively for these tasks.
Should you have any questions, please contact academy@emagiz.com.
1. Prerequisites
- Basic knowledge of the eMagiz platform
- Understanding of the concept of properties
- At least one flow for which you need to create a property or edit a property
2. Key concepts
This microlearning centers around property management.
With property management, we mean The process of creating, editing, and deletion properties based on changing circumstances (i.e., a new release).
There are several ways to manage your properties. Below we will discuss each of these steps separately.
3. Property Management
Within the eMagiz platform, you have property placeholders (i.e., the name of a property as given in Create), property configuration (i.e., on which runtime we need to configure this property), and property values. Property placeholders are generic and are re-used across releases. The specific configuration of a property (and the value) is linked to a particular release.
As a result, you can revert incorrect changes on properties by activating the previous release and deploying this. In this section, we will first focus on the property overview in Deploy. Following that, we will look at the options to add, edit and delete properties.
Once you have managed your properties and configured the values correctly for the environment, it becomes time to actualize the properties. In the following microlearnings, you can learn more about the actualization of properties:
3.1 Property overview in Deploy
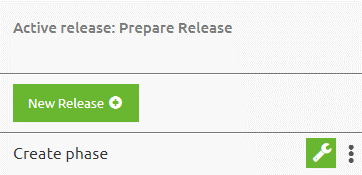
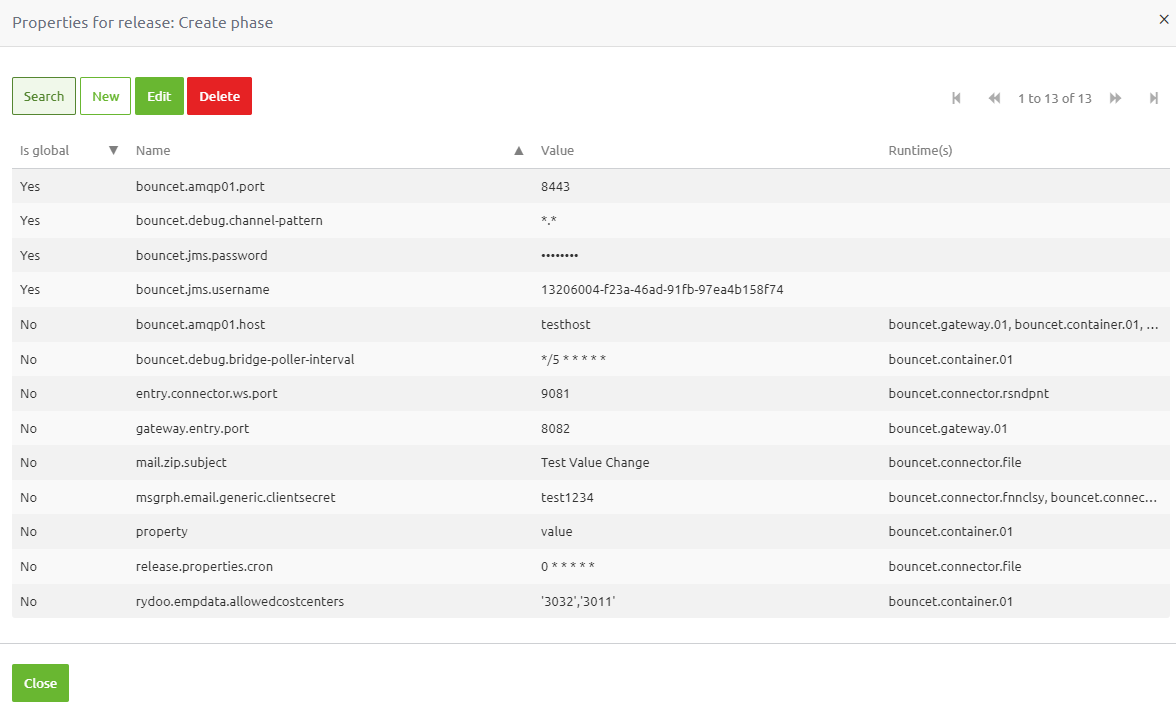
In the Deploy phase of eMagiz, the overview of all your properties on your environment can be found on the "Create Phase" release in Deploy -> Releases. You can access the summary by clicking on the "wrench icon." This is the main overview from which you can do property management, giving you the most functionality.
3.1.1 Comparing properties across environments (i.e., TAP)
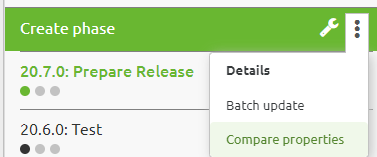
On this level, you can also compare properties across environments. You can do this by accessing the context menu and selecting "Compare properties."
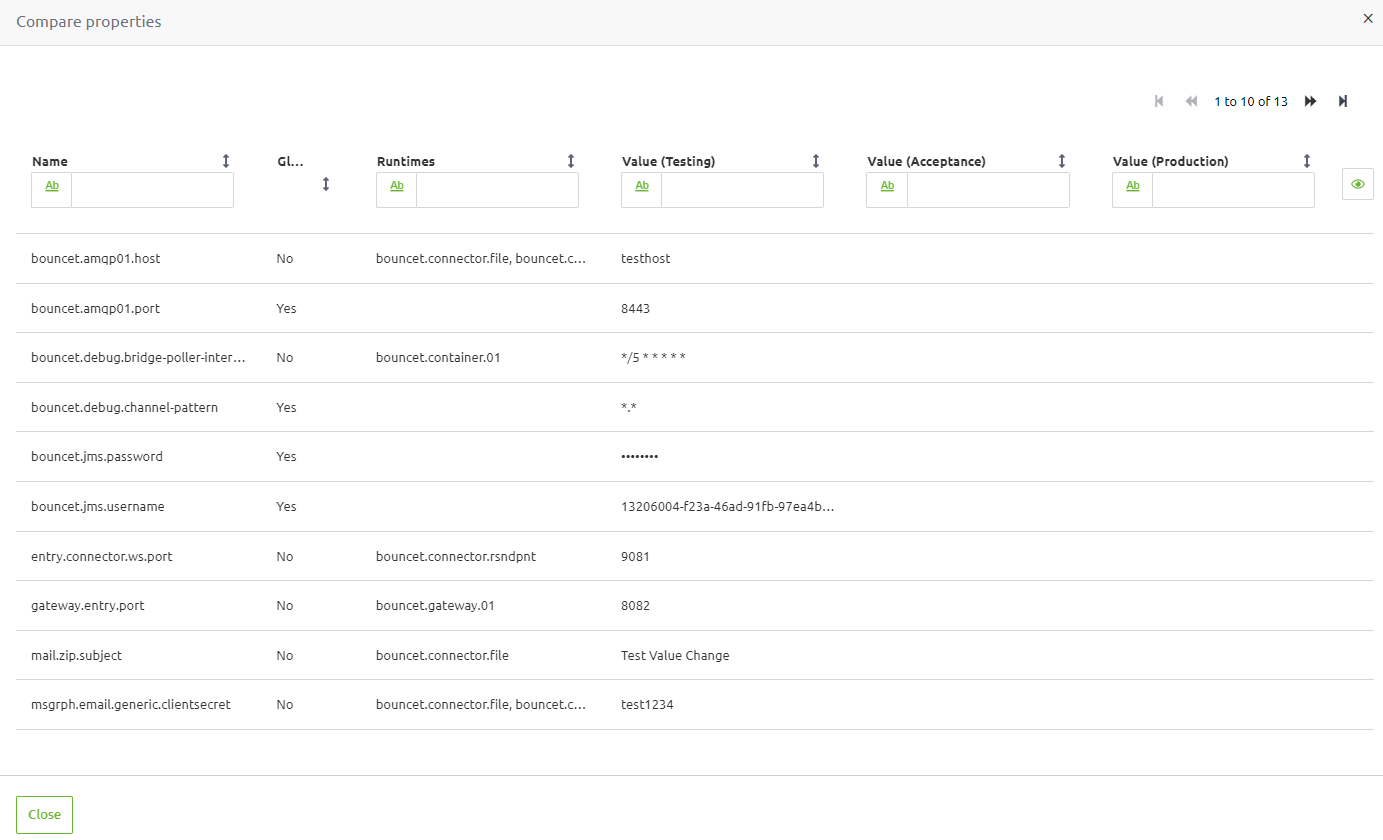
Selecting this option will lead you to a pop-up that shows per property placeholder the relevant configuration in terms of runtimes and values.
3.2 Add property configurations
3.2.1 Default method
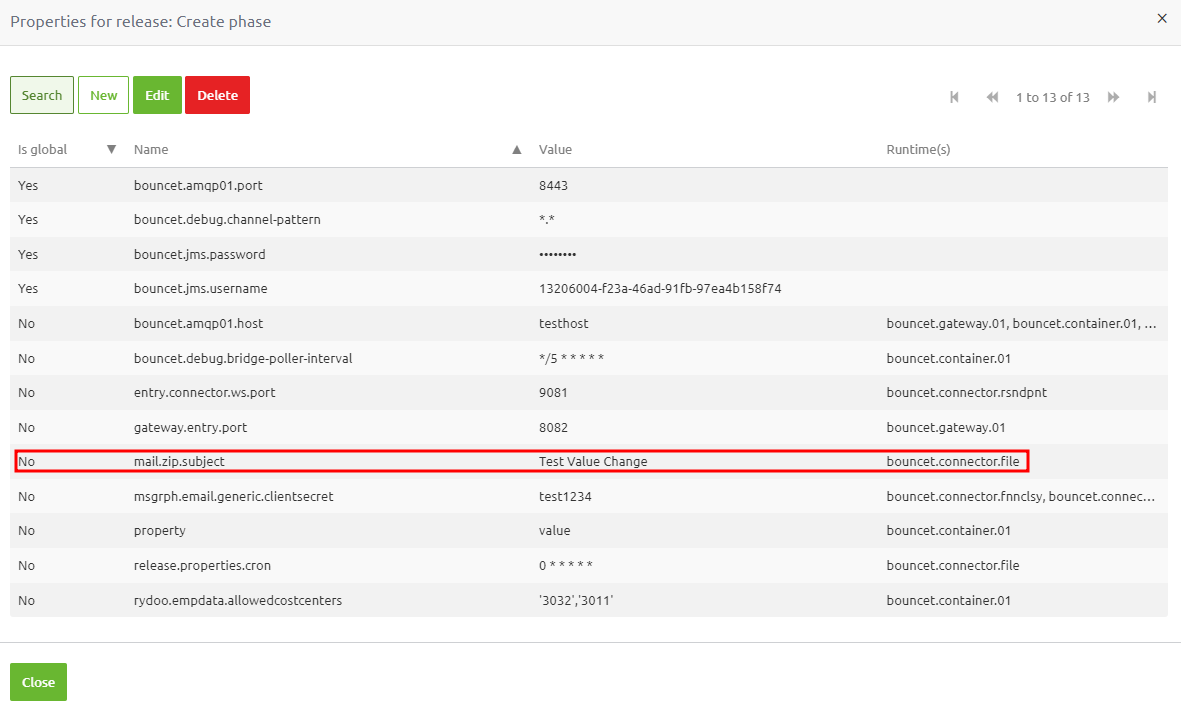
As you can see from the screenshot above, you can create properties via the New button, Edit properties via the Edit button, and Delete properties via the Delete button. To make life a little bit easier in this overview, there are various entities you can search on (i.e., Is Global, Runtime, Name, and Value)
Let us first focus on the addition of a new property. To add the property, press the "New" button. This will lead you to a new pop-up in which you can select the following items:
- Property placeholder
- Global property (Yes/No)
- Runtime(s)
- Value
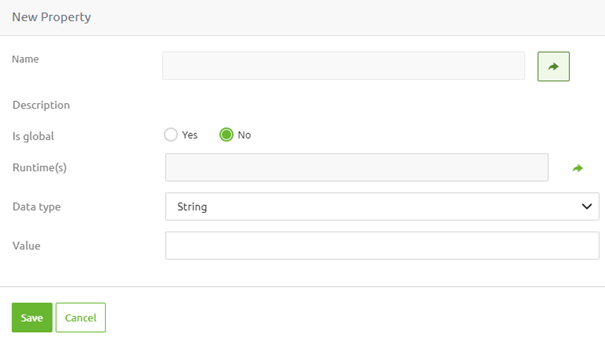
We start by selecting a property placeholder. We can do this by pressing the "Select" icon after the name placeholder. Based on the properties you have included in all flows in the Create phase with a flow version, we have generated a pre-defined list of properties to select from. This avoids mismatches in naming between what is configured on the flow level and what is registered in Deploy.
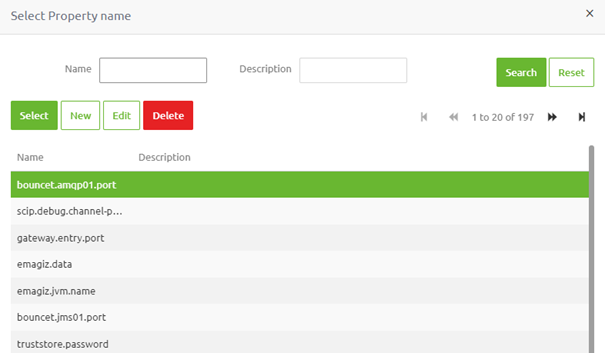
In the following pop-up, you can search for the property you want to configure and select it once found. After choosing the property placeholder, eMagiz will return you to the previous pop-up with the selected property placeholder filled in.
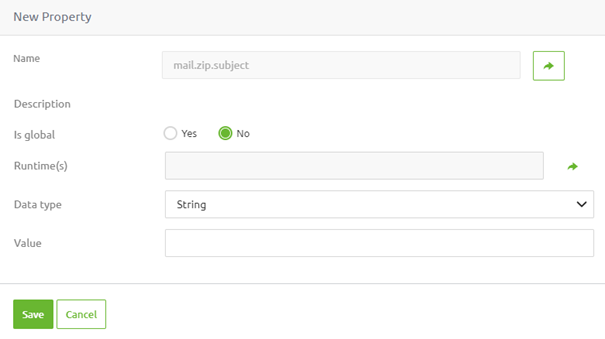
Once we have this configured, the next step would be to determine whether the property in question is global and, if not, select the relevant runtime(s) for which this property is applicable. Adding the same value for a property placeholder on multiple runtimes is helpful for larger models and those running in a double-lane setup. Instead of creating two (or more) entries for each runtime, you can configure one linked to multiple runtimes. This makes the management of properties much easier going forward.
To select a runtime, press the "Select" icon again. However, this time after the runtime(s) placeholder. This will lead you to another pop-up that allows you to select one (or multiple runtimes) for which you want to configure the property placeholder.
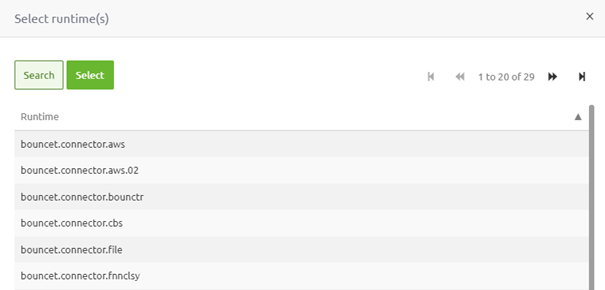
Once satisfied with your selection, you can press the "Select" button to tell eMagiz to select the runtime(s) you want. This action will return you to the "New Property" pop-up for the final part of the configuration.
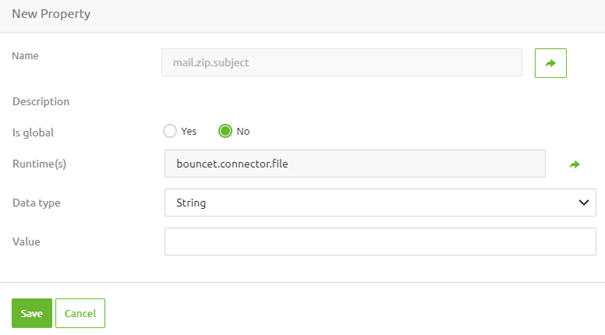
In this final part of the configuration, you select the data type and fill in the correct value for the property. Once done, you can press Save to finish adding a property.
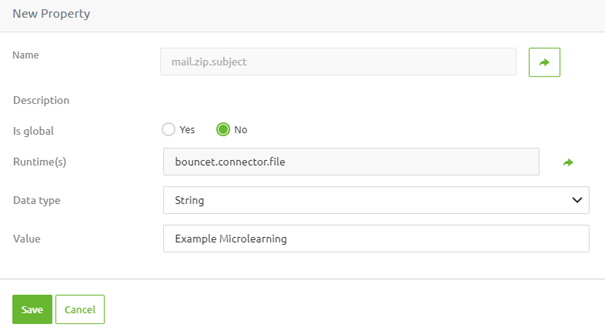
After pressing Save, you will be returned to the overview with an additional property in the list.
3.2.2 Alternative method
Apart from adding integrations beforehand, you can also wait until you want to activate (or deploy) your release for eMagiz to tell you which properties are missing.
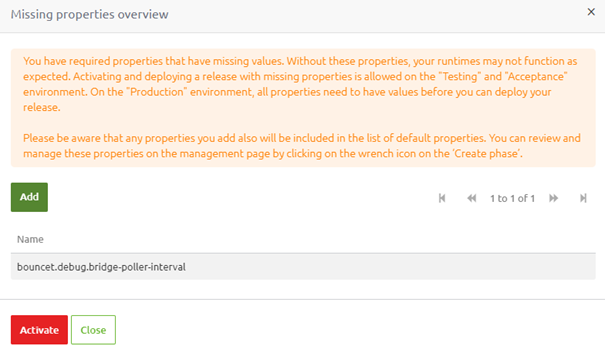
In this overview, you can press the "Add" button to add the relevant value for the property. Because eMagiz knows at this point which property placeholder is missing and in which runtimes it is used, these are already pre-filled in the "new property" pop-up.
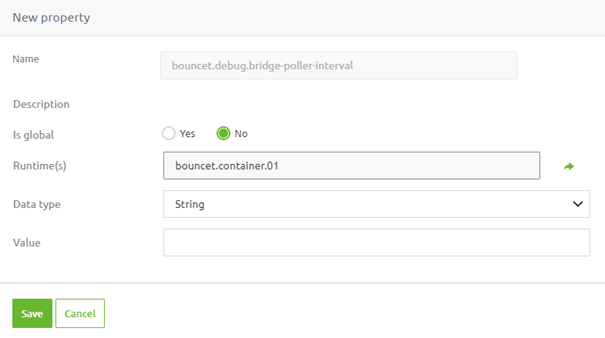
Here, you can add the values as discussed above and press Save. This will return you to the "Missing properties" overview from which you can Activate your release.
3.3 Edit property configurations
3.3.1 Default method
You can use the wrench icon on the active release when you only need to change a property value. This will show you all properties and their configuration comparable to the property management overview on the "Create phase release." There is only one distinction between the two. This property has a button in the bottom left corner called "Change properties."
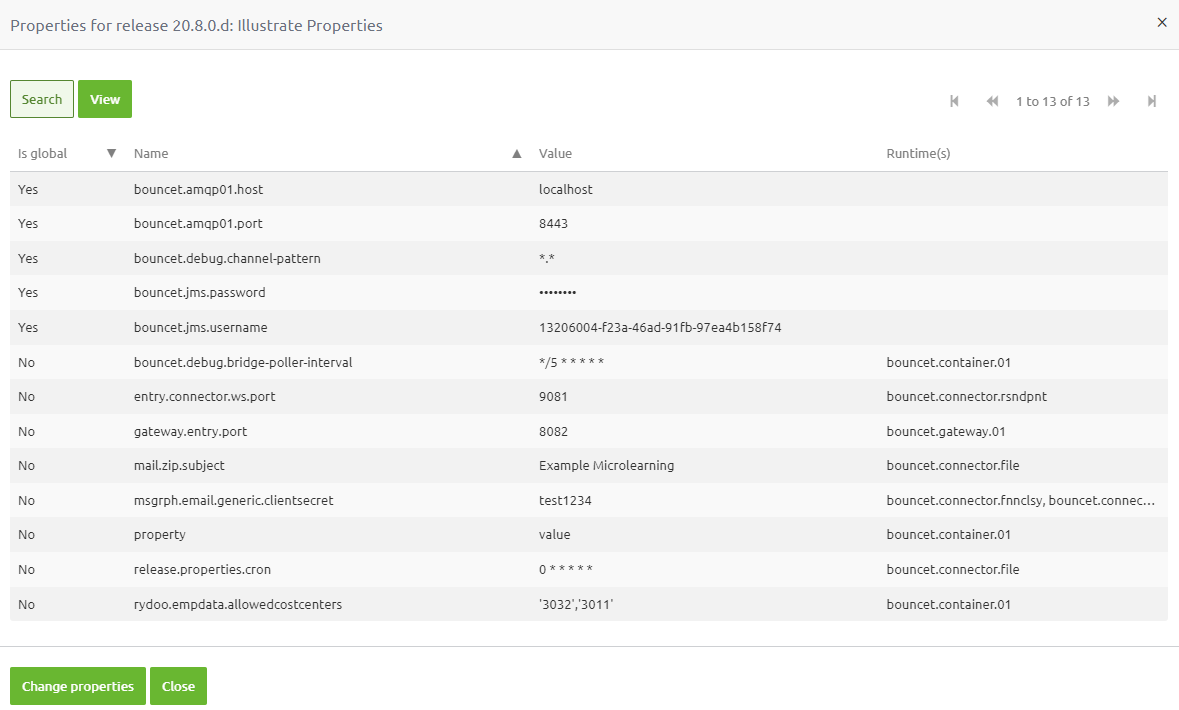
By clicking on this eMagiz creates what we call a "property release." This option is provided so you don't have to make and promote a new release to the specific environment. In the pop-up you see, you can edit properties to your liking, and once satisfied, press the button "Activate and deploy."
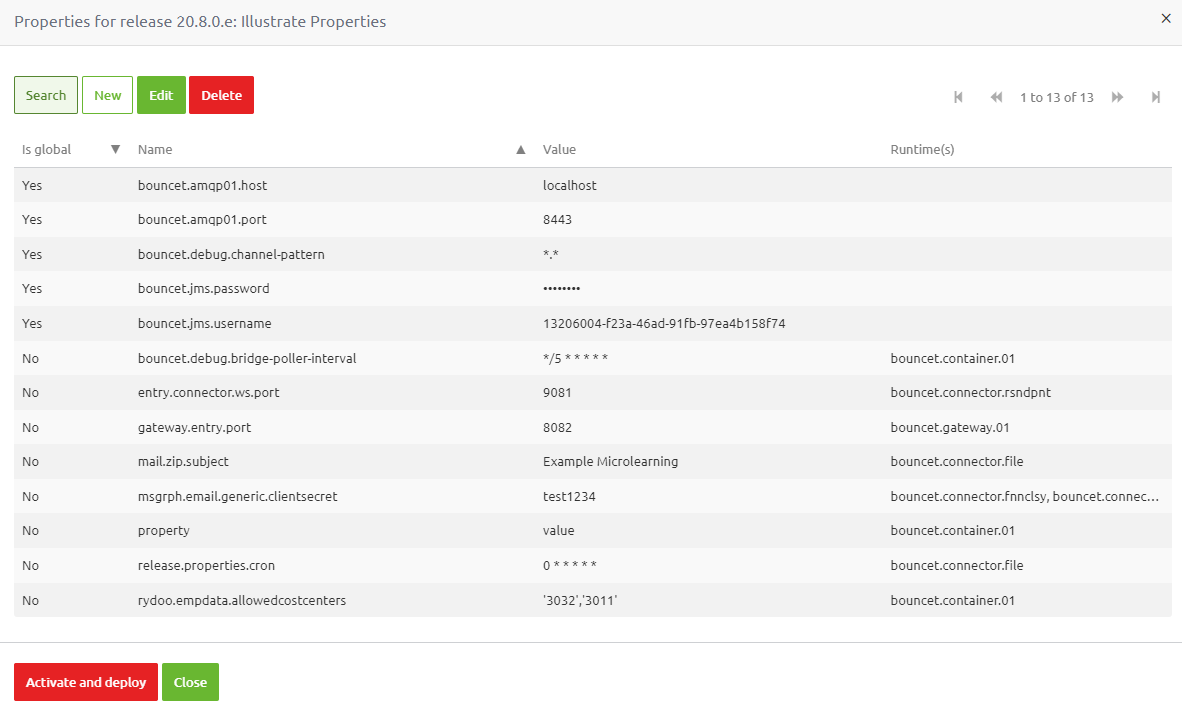
3.3.2 Alternative method
As with adding properties, you can also edit properties from the property management overview. Editing a property can be done by selecting the property you want to edit and pressing the button "Edit." This opens the same pop-up we saw before, only in this instance, everything is already filled in.

From here, you can change all the configuration options, and once done, press "Save."
3.4 Delete property configurations
3.4.1 Default method
In most cases, when you want to delete a property, you want to do this for the whole environment. In these cases, we navigate to Deploy -> Releases and select the wrench icon on the "Create phase" release. This will lead you to the property management overview, from which you can delete properties by selecting them and pressing the "Delete" button.

3.4.2 Alternative method
If you only want to delete a property within the context of a release, you can do this via the wrench icon on that specific release, just as we saw in section 3.3.1 of this microlearning. By using the same functionality, you can delete the property from the release by selecting the "Delete" button and not the "Delete (including default property)."
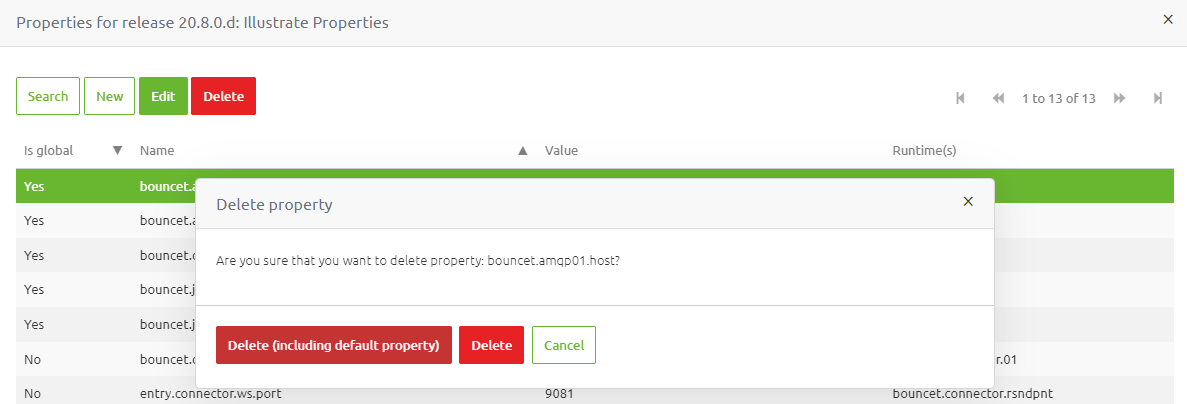
3.5 Property set to use
As you will only change a small portion of all the properties in your model on a specific environment, the remainder of the properties are re-used. Depending on the type of release created, the values will be re-used from a different "starting" release.
- In case you create a new functional release (including flow changes), the properties that are not changed will be re-used from the "Create phase release."
- If you create a new property release, the properties that are not changed will be re-used from the currently active release upon which you made the property release.
4. Key takeaways
- The property overview on the environment level can be found under the wrench icon on the "Create phase" release under Deploy -> Releases
- On this same level, you can compare properties across environments via the context menu
- For adding, editing, and deleting, there is a default and alternative method
- Without a flow change, you can actualize the property by activating a newly created release and stopping and starting the flow
- With a flow change, you can actualize the property by deploying a newly created and activated release
