Setting up a fileshare on Windows
In some cases there is a need to pickup file from a network or file share that is located on the client infrastructure. This can support the integration potential where files are generated from internal systems which can't be transported or made available via the Cloud. This microlearning will support this setup process.
Should you have any questions, please get in touch with academy@emagiz.com.
1. Prerequisites
- Basic knowledge of the eMagiz platform
- Novice & Intermediate course on File-based connectivity
2. Key concepts
A networkshare is a location somewhere in the client infrastructure where you can put files on just like a folder on your laptop. The location is a disk on a server or some other hardware and is managed by the client IT Infrastructure team. It is important to liase with these teams to ensure the appropriate access is granted.
3. Setting up a file share
3.1 How to create a network share?
3.1.1 Navigate to the folder you want to share
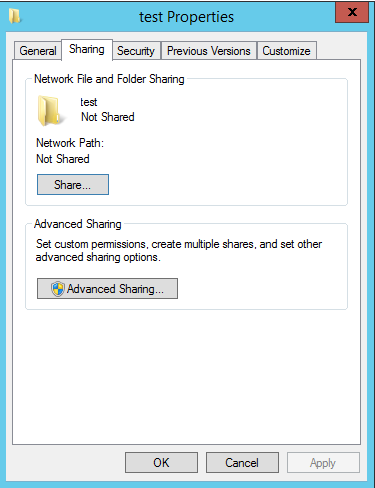
Right-click on this folder. Navigate to Eigenschappen/Properties and select Sharing. The end result should look similar to what is shown below:
3.1.2 Click on Advanced Sharing
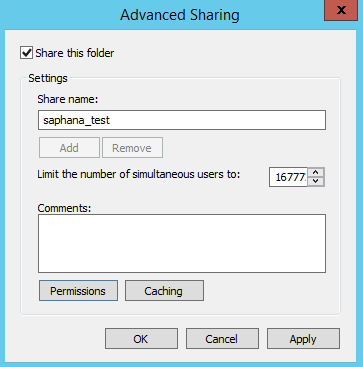
- Select the tickbox to share the folder.
- Give the share a name. Naming convention used is {systemname_environment}. If there are more integration models with simular system names, then the naming convention is {modelname_systemname_environment}
- Click on the button called Permissions
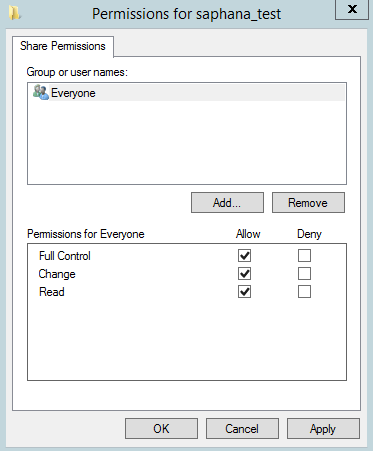
- Select Everyone, give them full control. This is because you want all users in the organisation to be able to see the share (access is arranged elsewhere, described further in this document) The permissions page should look similar to this:
- Press apply and press OK. This will send you back to the previous tab (Advanced Sharing). This should look like this
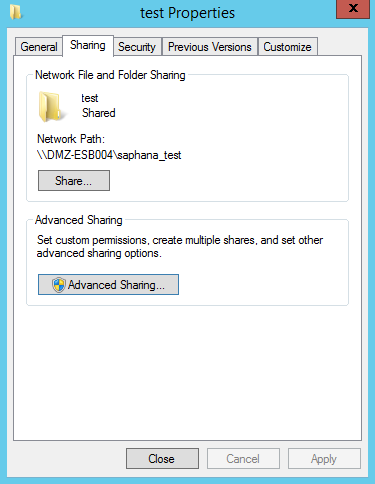
- Press Apply and OK. This will send you back to the previous tab (Share). The end result should look similar to this. As you can see a network path has been added.
3.2 How to configure the access rights?
Navigate to the tab called Security
The security tab you need is the one from the folder for which you just created a network share.
- Click here on the button called Advanced. This leads you to the next screen
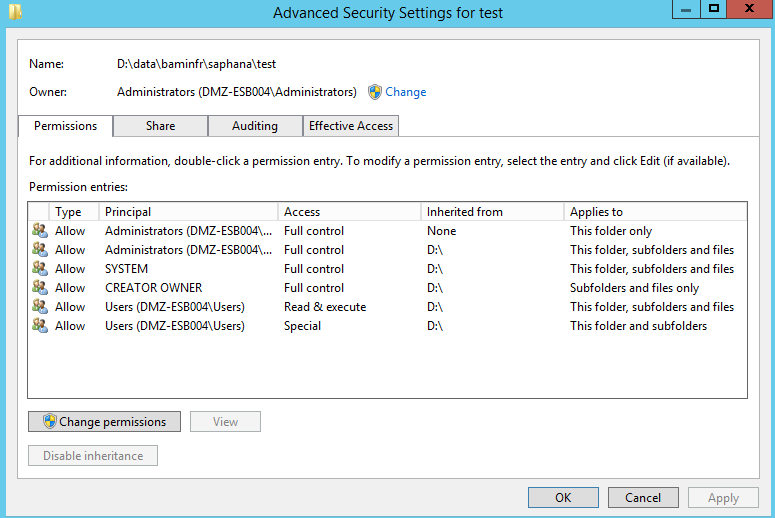
- Press the button Change permissions
- Select one of the entries and press Disable inheritance. This is required to configure explicit access rights for the share. This will give you the following pop up
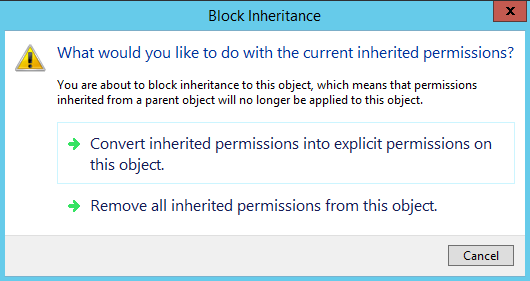
- Select the option called: “Convert inherited permissions into explicit permission on this object”. This will lead to the following screen
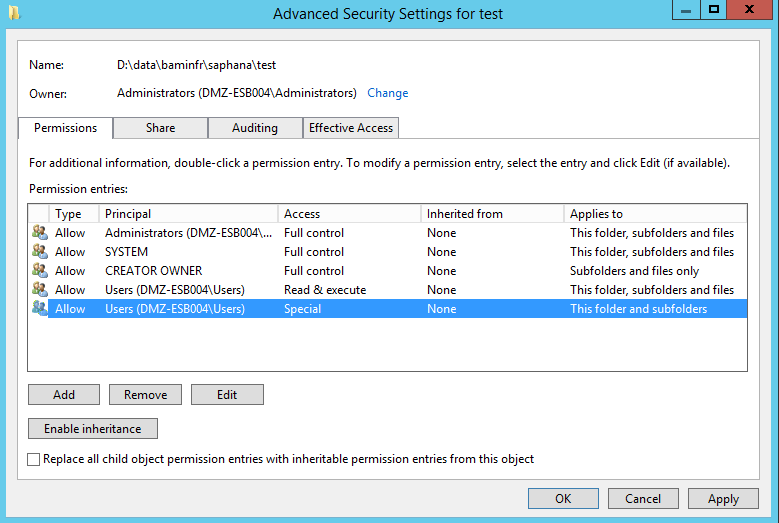
- Select all entries for ‘Users’ (in this example there are two) and select remove. This is important because otherwise ALL users in the organisation would have access rights to this share.
- Make sure the Owner is an Administrator AD group and not a single user. In this example this is configured correctly.
- Click on the button Add. This will lead you to the new screen
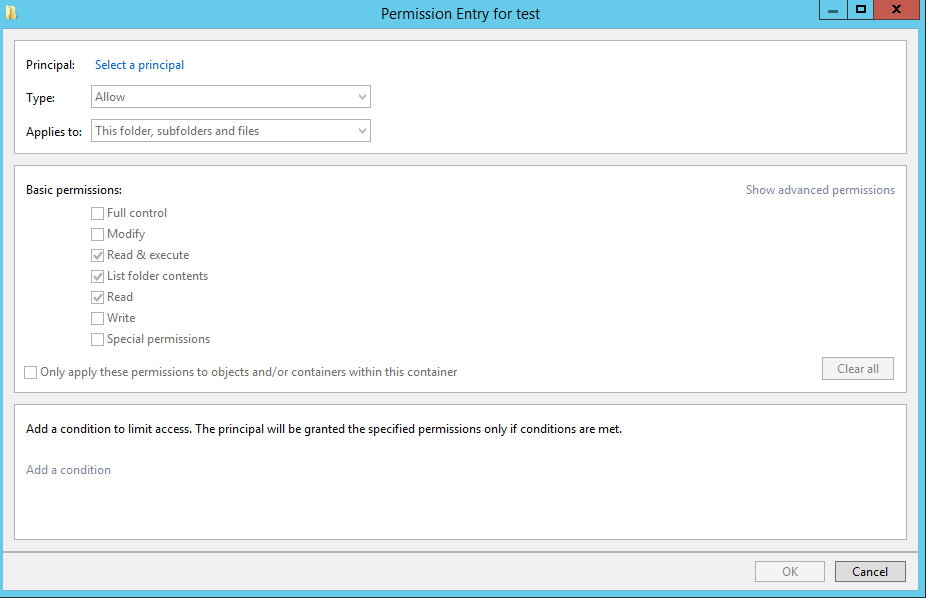
- Click on select a principal and when presented with the pop-up type in the name (or part thereof) of the AD group you want to grant rights to the share. It is important the rights are only granted to AD Groups and not to individual persons. For system users this is allowed.
- Click on the button Check names if the name is not yet underlined. Select the correct name and press OK. This leads to something similar to this
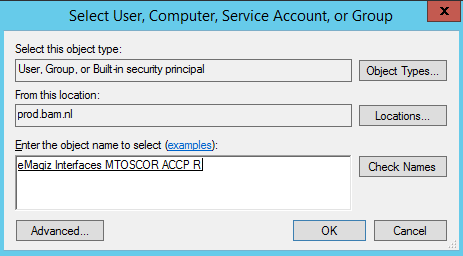
- Press OK
- Select the corresponding rights you want to give to the AD Group you just selected
- Full control in case of Read & Write rights
- Standard rights which is the default Windows suggestion in case of Read rights.
- Full control in case of Read & Write rights
- These actions make sure you end up with something comparable to this
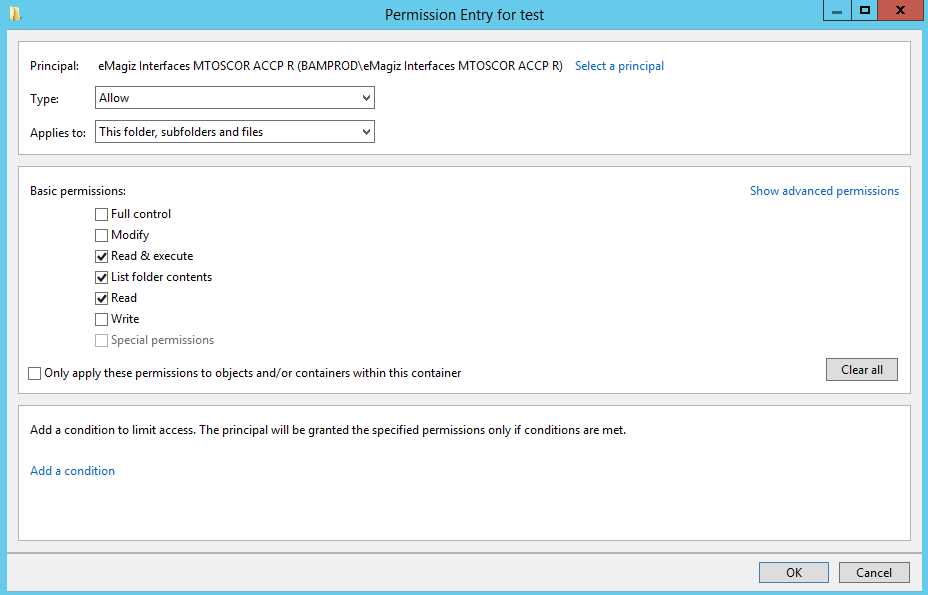
- Press OK
- If you are done, Press Apply and then OK, else press Add to add a new AD group that needs rights to the share.
- Press Close
- You are done.
4. Key takeaways
- Give rights to AD Groups on the Production and Acceptance environment and not to specific users
- Name all network shares according to a pre-defined naming convention
- Since build 50 the underlying frameworks of eMagiz is using an updated version of Java, which uses a different approach (Java method) for verification. In previous versions, bullet 1 below is used; in the current version bullet 2 is used as approach. This are code extracts with some explainations, but in essence the recent version is checking whether the JVM has sufficient rights via the Windows permission structure. This has an impact on current implementations, as certain permission structures are no longer sufficient. One known example is that the service user of the eMagiz Connector need to have write access to the entire network path configured. In the past, the windows permission structure was not used to determine whether the JVM could write a file to a network share or not.
5. Suggested Additional Readings
If you are interested in this topic and want more information, please read the release notes provided by eMagiz. Furthermore, check out these links:
