Configure an eMagiz Connector
In this microlearning, we'll cover configuring the eMagiz Connector for your Mendix application. The eMagiz Connector is a module that facilitates seamless integration between Mendix and eMagiz projects. We’ll walk you through the essential configuration steps, including setting up startup and shutdown processes, configuring the activation key, creating the on-receive microflows, and, if needed, import/export mappings. On top of that, we will provide you with a shortened guide on configuring the various variants of connections between Mendix and eMagiz. In the course on Intermediate Level, we will further explore the functionality in both eMagiz and Mendix for setting up specific connections (i.e., setting up an asynchronous exit). By the end, you'll be ready to ensure a stable and secure connection between your Mendix application and eMagiz.
Should you have any questions, please contact academy@emagiz.com.
1. Prerequisites
- Basic knowledge of the eMagiz platform.
- Access to a Mendix application.
- Access to the Deploy phase of your eMagiz project.
- A connection between Mendix and eMagiz Designed and Created.
- A Mendix app running on Java 17 or Java 21.
- You can set the Java version of your application in Mendix Studio Pro at App > Settings > Runtime.
- For local development, specify where the JDK is located for the selected Java version. You can do so in Mendix Studio Pro at Edit > Preferences > General.
- A Mendix app with a Mx version of 9.24.25 or higher.
2. Key concepts
This microlearning centers around configuring an eMagiz Connector
With eMagiz Connector, we mean: A Mendix module developed and maintained by eMagiz that simplifies connecting a Mendix application to an eMagiz project for data traffic between both systems.
To configure an eMagiz Connector, you need the following:
- Configure the After Startup and Before shutdown
- Configure the activation key
- Configure the on-receive microflows
- Configure the import/export mapping
3. Configure a eMagiz Connector
To configure the eMagiz Connector in a Mendix app, the following steps must be performed. Before proceeding, please check the following.
3.1 Configure the Access rights to the eMagiz Connector Module
It is recommended that only the administrator user role has access to the eMagiz Connector module.
To do this, follow these steps:
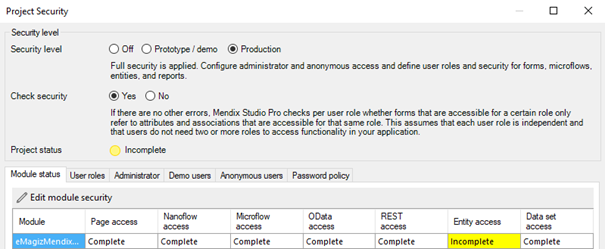
- Navigate to Project Security
- Validate that the security of your project is set to Production. If not, please select the Production option

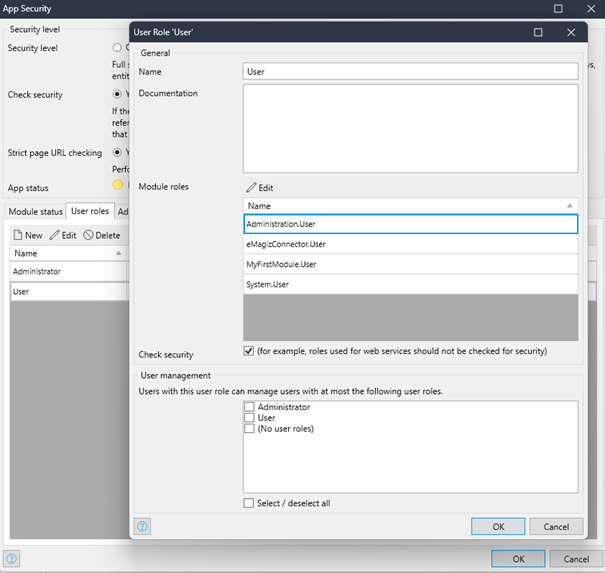
- Navigate to User Roles
- Edit the User role
- Edit the Module roles
- Check the box of the eMagiz Connector module and press OK
The configuration before you press OK should look as follows

This configuration only needs to happen once.
3.2 Configure the after startup and before shutdown
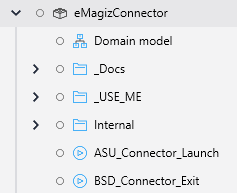
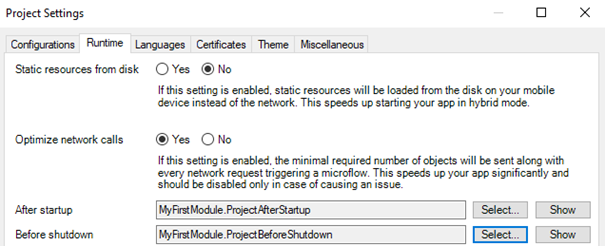
Once the security is in place the first step of configuring your eMagiz Connector is to connect the After Startup (ASU_Connector_Launch) and the Before Shutdown (BSD_Connector_Exit) microflow that eMagiz provides you as part of the connector module to the existing "After Startup" and "Before Shutdown" microflow of the project itself.

After you have linked them to the project after startup and the project before shutdown, ensure that these microflows are indeed triggered on the Project level. You can verify this by navigating to Project Settings -> Runtime.

This configuration only needs to happen once.
3.2.1 Expand the after startup with "Start" actions per producer/consumer
For every producing (i.e., sending information to eMagiz) and consuming (i.e., receiving information from eMagiz) action, you need a corresponding StartAction.
The actions come in the variety of StartMessage..., StartString..., StartSyncMessage... and StartSyncString.... If you want to connect to a synchronous messaging pattern in eMagiz, use the StartSync... Java action; otherwise, the plain Start... actions should be used. You can use the String or Message variant to send/receive Strings or Mendix Objects in your microflows.
All of the parameters of the Java actions describe what they mean.
- Import/Export mappings are mandatory when using message producers/consumers.
- When using message consumers, the importObjectType must match the input parameter type of the receiving microflow.
- In addition to the previous point, synchronous message consumers require the receiving microflow to return data matching the input of the export mapping. Wrong data does not prevent the application from starting but will cause errors.
- The validateMessage setting of consumers and sync-producers can be used to skip the xml-validation filter in the flow. If left empty, by default, messages coming into Mendix will be validated against the system message definition as defined in eMagiz. Outgoing messages are not validated by the eMagiz connector.
- The max-concurrent-consumers parameter when starting consumers defaults to 1 for async consumers and 2 for sync consumers. This decreases the chance of a second request having to wait for the first to finish, which could lead to timeouts. If more concurrency is needed, the number can be increased when starting the (sync) consumer.
For a detailed description per available connection method please take a look at this course.
3.3 Configure the activation key
This unique activation key identifies your Mendix system with our infrastructure and allows your Mendix application. The eMagizConnector module has a constant called "Activation key." This must be filled in with the correct value to connect your Mendix system to the proper model/environment combination. You can validate this by checking the first part of the activation key that defines the following.
- Environment to connect to.
- Name of the Mendix system as given by the eMagiz developer.
- Technical name of the eMagiz model to which your Mendix system will connect.
- Technical name of the company to which the eMagiz model belongs that you connect to with your Mendix system.
An example of this would be "TEST:AWAY:MSGRED:CAPE.{someautogeneratedstring}."
3.4 Sending messages (Optional)
When all of the consumers and producers are started in the after-startup microflow, the Send Java actions in the _USE_ME folder can be used in the application. The Send operation should always match the type of the Start action in the after-startup microflow.
For example, if you start the producer with the StartSyncStringProducer Java action, you have to use the SendAndReceiveString Java action instead of the SendString.
If sending a message fails, there is no retry behavior by default. This means the data might get lost if no proper error handling is configured. This can be mitigated by using a Task Queue with retry behavior. Further instructions on how to configure this can be found in step 7.1 below.
Sending a message to a queue that does not have a StartProducer Java action call in the after-startup will throw errors.
3.4.1 Retry behavior (Optional)
When an error occurs during message sending with the eMagiz Connector, no retry behavior is implemented by default. Depending on the application's structure and error-handling configuration, this could potentially lead to data loss. This problem can be mitigated by executing the send Java action in a Task Queue. This Task Queue can be configured with retry behavior to maximize the chance of delivery.
You must create a Task Queue to configure retry behavior when sending a message. The Mendix Documentation provides instructions on how to do this.
After creating the Task Queue, open the Java action in your microflow, which you are using to send messages. A checkbox at the bottom of this screen says, “Execute this Java action in a Task Queue.” Enable this checkbox and select the Task Queue you just created. After selecting the Task Queue, the option to configure retry behavior will be shown. Depending on your use case, you can choose a fixed delay or an exponential back-off. The difference between these options can be found on Mendix's previously mentioned documentation page.
4. Key takeaways
To configure an eMagiz Connector, you need the following:
- Configure the after startup and before shutdown
- Configure the correct Java actions
- Configure the activation key
- Configure logic to send messages, including retry behavior (optional)
