
Solutions
Last modified by CarlijnKokkeler on 2022/10/20 14:29
In this microlearning, we will educate you on what we mean when we talk about message definitions.
Should you have any questions, please contact academy@emagiz.com.
1. Prerequisites
- Completion of the exercises from the Data modeling in Design use case from the XML/JSON Transformations use case.
2. Key concepts
This microlearning contains the solutions to the exercises from the Data modeling in Design use case.
3. Transformations in Create
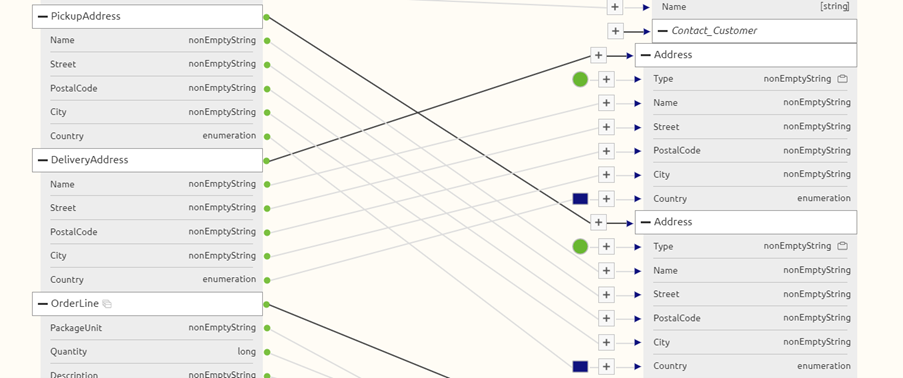
- Ensure that the CDM and System messages follow the standards for country code as given below.
- Add ISO-3 standard enumeration values for the attribute Country in your CDM message. This can be done in Create.
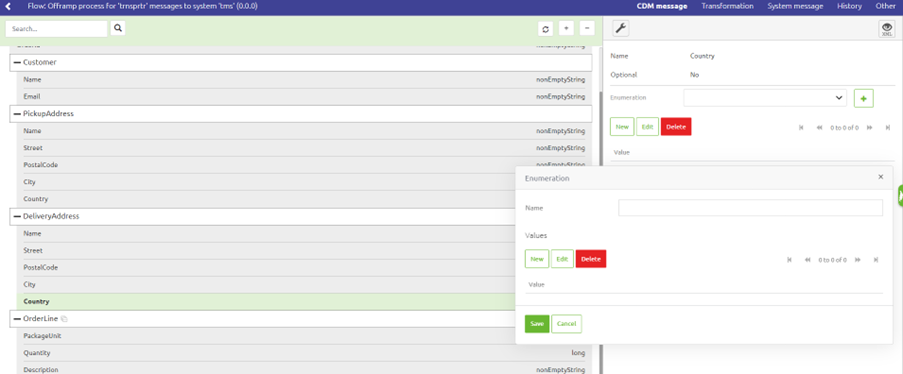
- Note that the enumeration values have to be added twice; for Country in PickupAddress and for Country in DeliveryAddress.

- Add ISO-2 standard enumeration values for the attribute Country in your System message. This can be done in Create.

- Map the enumeration values for the attribute Country in Transformation. This can be done in Create.
- Click on the plus button next to the attribute Country, and add a New transformer by clicking on the button completely to the left.

- Complete the value mapping.
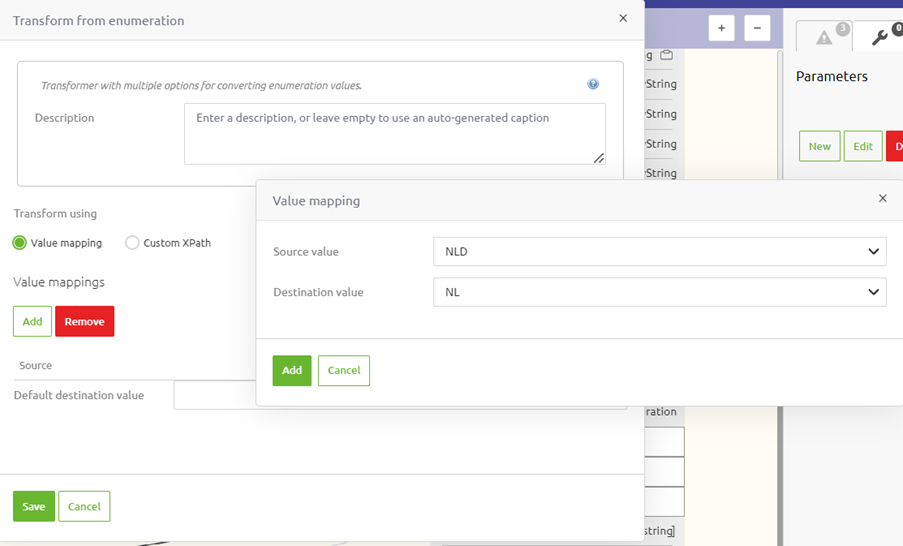
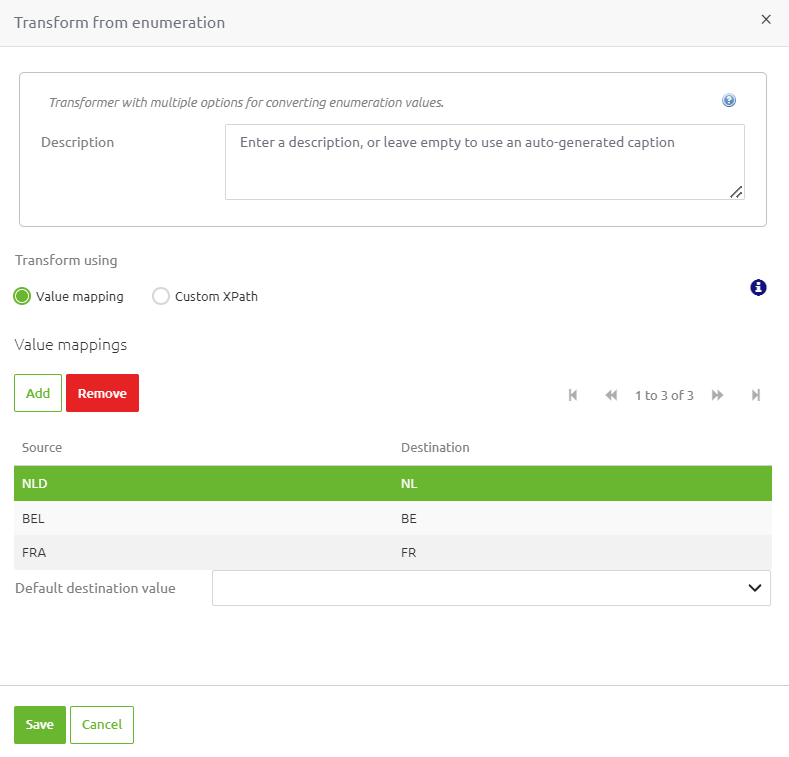
- Note that this mapping has to be done twice; for Country in PickupAddress and for Country in DeliveryAddress.
- Add ISO-3 standard enumeration values for the attribute Country in your CDM message. This can be done in Create.
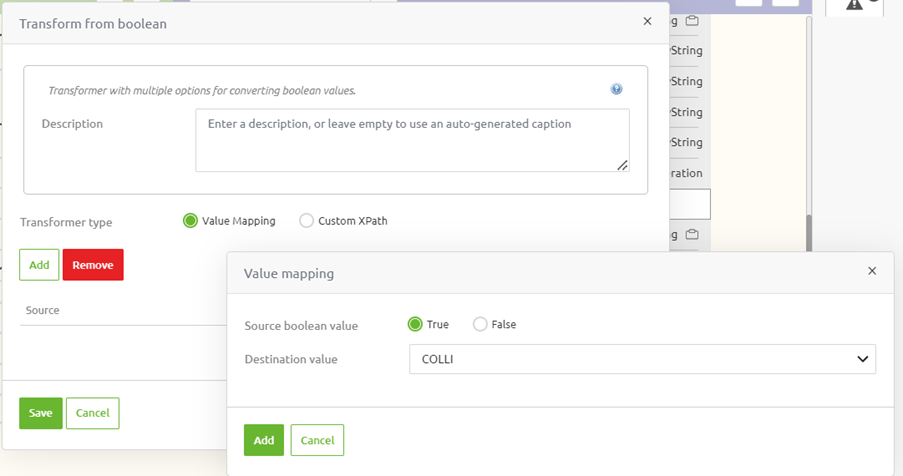
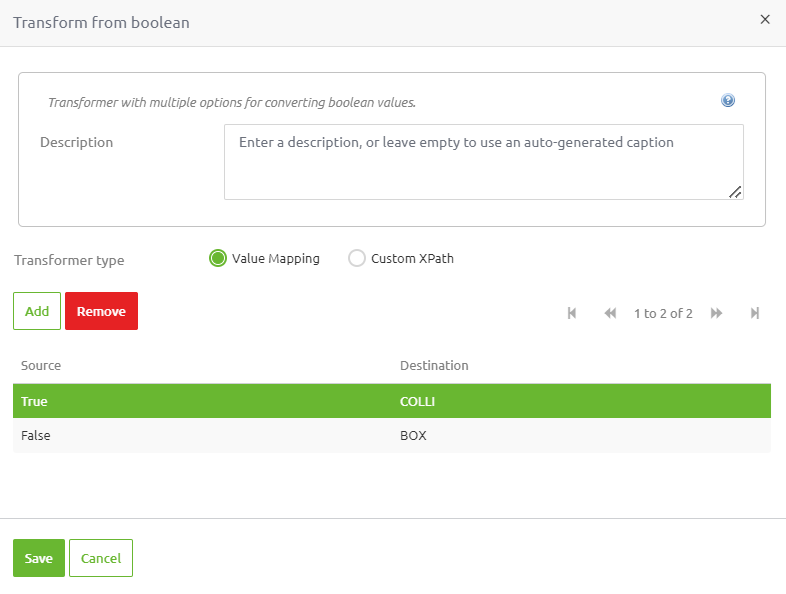
- Map values for units.
- First change the data type of the attribute PackageUnit in your CDM to boolean.
- Click on the plus button next to Unit in the Create Transformations screen, and click on the filter most to the right.

- Add 'COLLI' as destination value for source boolean value 'TRUE', and 'BOX' as destination value for source boolean value 'FALSE'.
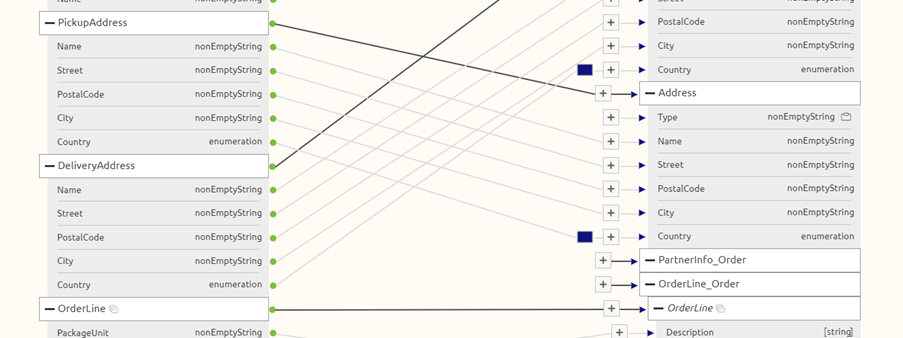
- Add fixed values.
- Add a static input to the Type attribute from the entity Address by clicking on the plus in the Create Transformations screen, and clicking the green circle in the middle.

- Note that the static input needs to be added twice; for PickupAddress and DeliveryAddress. Either pick 'pickupaddress' as a value, or 'deliveryaddress', depending on the transformation.
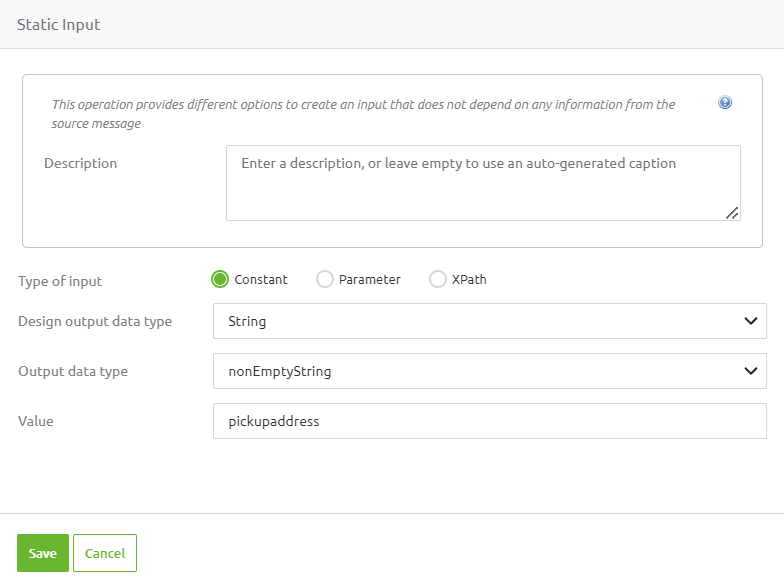
- Add a static input to the Type attribute from the entity Address by clicking on the plus in the Create Transformations screen, and clicking the green circle in the middle.
- Change when an attribute is generated.
- Make sure that a Description attribute is only generated if a description exists by clicking on the plus in the Create Transformations screen, and clicking the destination filter, the second from the left.

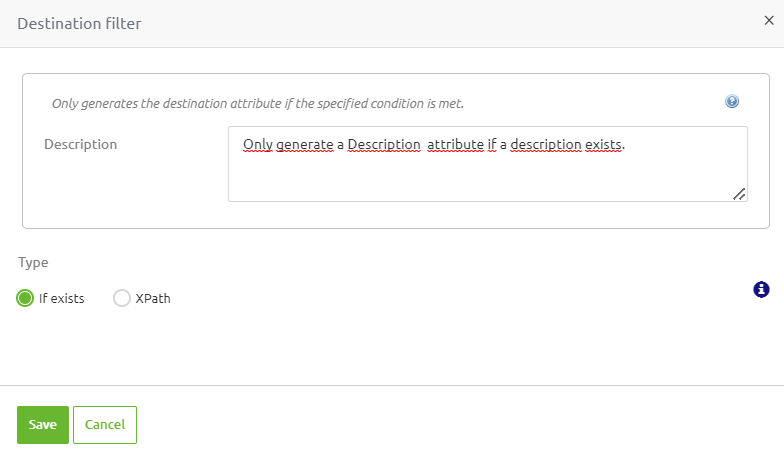

- Make sure that a Description attribute is only generated if a description exists by clicking on the plus in the Create Transformations screen, and clicking the destination filter, the second from the left.
- Add conditionals.
- Use XPath to ensure that the city 'Enschede' is changed 'Hengelo'.
- Click on the plus in the Create Transformations screen, and click on the 'New Conditional' filter, most to the right.

- Add a new conditional using Custom XPath, with the following XPath:
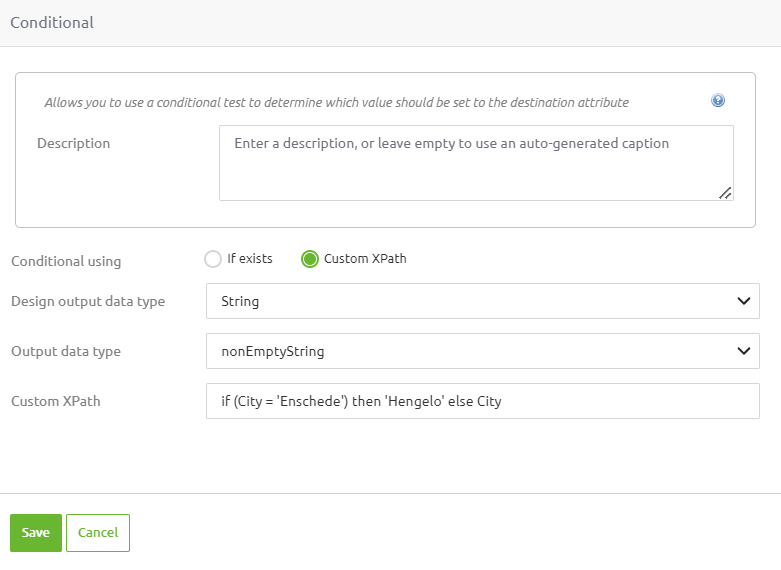
- Note that this has to be done twice; for the delivery address and the pickup address.
4. Key takeaways
- The CDM holds all entities and attributes that are relevant within the context of your complete integration landscape.
- The CDM message is tailor-made for a specific piece of data and only holds the entities and attributes relevant for that piece of data.
- A system message is specific to a system.
5. Suggested Additional Readings
If you are interested in this topic and want more information on it please read the help text provided by eMagiz.