Handling multiple namespaces
In this microlearning, we'll explore how to handle multiple namespaces within eMagiz. Namespaces in XML documents are essential for distinguishing different sets of elements and attributes. We’ll discuss how to use eMagiz’s functionality to manage these namespaces, including how to add and define them, transform messages, and validate data. By mastering these techniques, you'll ensure your XML messages are correctly structured and processed, even when dealing with multiple namespaces.
Should you have any questions, please get in touch with academy@emagiz.com.
1. Prerequisites
- Advanced knowledge of the eMagiz platform
2. Key concepts
This microlearning focuses on handling multiple namespaces.
With namespace, we mean a set of uniquely named elements and attributes in an XML document.
To achieve this, we need to use the additional namespace functionality of eMagiz. With this functionality you can:
- Add namespace and define prefix per unique namespace on system message level
- Make use of the unlocked additional namespaces functionality when transforming the message
3. Handling multiple namespaces
Sometimes you encounter definitions of external systems that refer to other definitions in different namespaces. As a result, the XML message you need to send or receive contains multiple namespaces. As of our Conflict Resolution release one definition in eMagiz can include additional namespaces. On the system level in Create, you can define each of these namespaces so you can use them to transform and validate the message via the standard tooling without the need for additional workarounds. In this microlearning, we will discuss how you can achieve this.
To achieve this, we need to use the additional namespace functionality of eMagiz. With this functionality you can:
- Add namespace and define prefix per unique namespace on system message level
- Make use of the unlocked additional namespaces functionality when transforming the message
3.1 Define additional namespaces
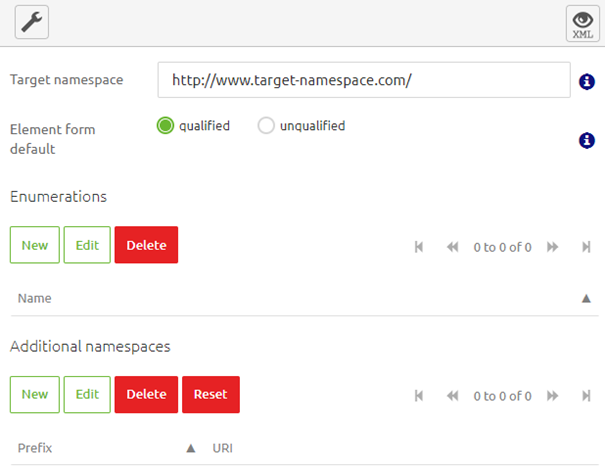
Before we can validate our system message with the tooling of eMagiz, we need to define the additional namespaces on system message level. Luckily there is functionality available within the portal that helps you achieve this. To do so navigate to Create and open the flow in which you want to validate the message. In this flow you enter "Start Editing" mode. When in "Start Editing" mode you can navigate to the system message overview. When selecting the wrench icon you will see the option to add additional namespaces.

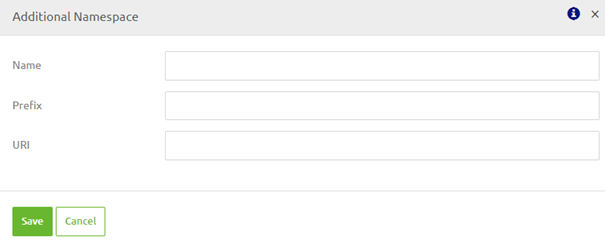
To add an additional namespace simply press "New" and eMagiz will show you the following pop-up in which you can define a name, a prefix and a namespace. Note that all of them need to be unique within a system message.

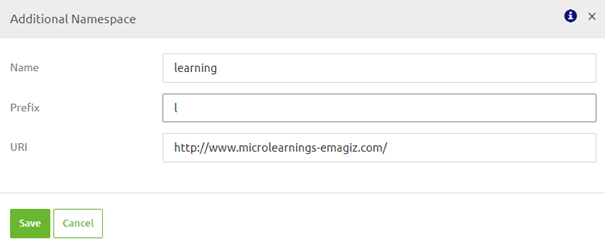
In this pop-up you can define the correct values for each of the three attributes.

Once you are satisfied with your input you can press Save to add the additional namespace to the list of additional namespaces.

When you have saved your additional namespace eMagiz will automatically make this additional namespace available within your transformation. This is particularly useful for namespaces that unlock additional XPath features such as format-dateTime and dateTime calculations.
To let eMagiz correctly validate the system message you need to define per element within the system message in which namespace it should be.
3.2 Select Additional Namespace(s) for validation
To define per element within your system message in which namespace they should be validated you can navigate through the tree view of your system message and define per element (i.e. entity or attribute) what the correct namespace is. When you do so eMagiz will automatically update the validation and transformation accordingly if possible. This means that when you use a custom XPath you should manually change this to reflect the changes in namespace but when you simply use the line as drawn in Design eMagiz will automatically update the XPath so your transformation will keep working.

3.3 Reset selection
In moment where you made a mistake or where you come to the conclusion that the additional namespace functionality is not needed you can use the reset button on the additional namespaces overview to reset the system message to its original state (i.e. without additional namespaces).

When you press this button you will be prompted with a confirmation pop-up asking you whether you are sure and aware of the consequence. Please read the pop-up carefully before carrying out this action.

4. Key takeaways
- With standard eMagiz functionality, you can add and remove additional namespaces
- eMagiz will update the validation and transformation if possible
- When using custom XPaths you should manually update them after you added the additional namespaces
- When selecting a namespace for a top level entity all elements that are direct descendants will be updated with the same namespace if there is no namespace present yet for these descendants.
- You can use the target namespace for entities that are in the "standard" namespace. This way you don't have to specify the namespace explicitly for those elements.
- You have the option to Reset your selection and start over again
