Image Transformation
In this microlearning, we’ll cover how to perform image transformations in eMagiz. Image transformation involves converting raw image data from one format to another, such as from JPEG to PNG. This can be useful for standardizing image formats before using them in your applications. We’ll guide you through configuring the image transformer component, ensuring you understand supported formats and how to handle input and output images effectively. Let’s explore how to set up and execute image transformations in eMagiz.
Should you have any questions, please get in touch with academy@emagiz.com.
1. Prerequisites
- Expert knowledge of the eMagiz platform
2. Key concepts
This microlearning focuses on performing image transformations in eMagiz.
By image transformation, we mean transforming the raw data that represents an image into another image format.
- Read the help text of the component to understand which formats are supported
- Ensure the input image is supplied in the correct format
- Ensure you wrap the output image in something if you want to do additional transformations on the data further downstream
3. Image Transformation
In most cases, you will transform XML messages to other XML messages, or you will transform JSON or EDI messages in another of these formats. However, sometimes you want to perform an image transformation. With this image transformation, you can convert images in specific formats to another format (i.e., png). This can come in handy when you want to standardize the image format before using it further downstream in your business application(s).
Before we dive into the specifics of how to configure this, let us first consider the following:
- Read the help text of the component to understand which formats are supported
- Ensure the input image is supplied in the correct format
- Ensure you wrap the output image in something if you want to do additional transformations on the data further downstream
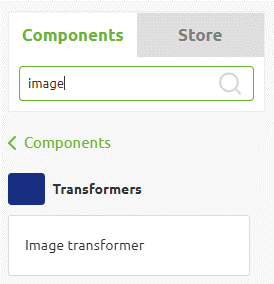
When turning to the Create phase of eMagiz, we need to open the flow and enter "Start Editing" mode to add the necessary component. For example, in the left panel, you can search for "Image." This will yield the following result.

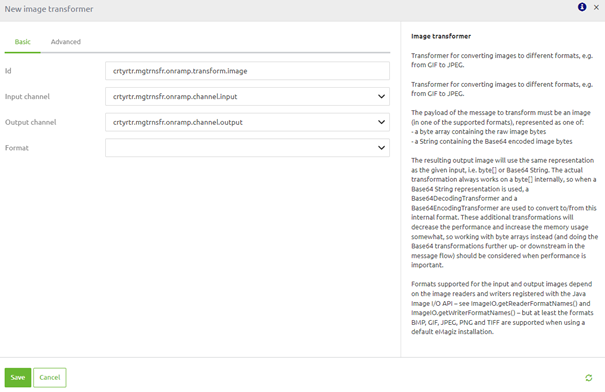
After dragging the component onto the canvas, you must define the channels first.

Secondly, we must select the desired image format we want to transform. Finally, the field indicates all valid values you can choose. Please note that 'PNG' is the default selection.

Once you have done this, the component configuration is finished, and you can transform your input image to a desired output image format.
4. Key takeaways
- Read the help text of the component to understand which formats are supported
- Ensure the input image is supplied in the correct format
- Ensure you wrap the output image in something if you want to do additional transformations on the data further downstream
