
Calling a Synchronous Queue in Mendix
In this microlearning, we will integrate Mendix with eMagiz using the eMagiz Mendix module. Here, we will guide you through calling a synchronous queue in Mendix, essential for efficient data exchange between your systems.
Should you have any questions, please get in touch with academy@emagiz.com.
1. Prerequisites
- Intermediate knowledge of the eMagiz platform
- Access to a Mendix application (potentially via an external party)
- Access to the Deploy phase of your eMagiz project
- A connection between Mendix and eMagiz Designed, Created, and in the active release
- Using the "eMagiz Connector" in the Mendix Marketplace.
- Initial installation done.
- Initial configuration done.
2. Key concepts
This microlearning centers around calling a synchronous queue in Mendix.
- With eMagiz Connector, we mean A Mendix module developed and maintained by eMagiz that simplifies connecting a Mendix application to an eMagiz project for data traffic between both systems.
To call a synchronous queue in Mendix, you need the following:
- The destination (i.e., the queue from which you want to retrieve the information)
- Execute microflow (the microflow that will process the incoming data)
- Optionally, you can define an import mapping and subsequent options.
3. Calling a synchronous queue in Mendix
With the help of the Mendix module (called eMagiz Connector) created by the eMagiz team, you can easily connect between Mendix and eMagiz for data integration. This microlearning will focus on calling a synchronous queue in Mendix. For sending data to Mendix, we offer two options to send data:
- Using the import and export mapping to send data to Mendix.
- Sending a string to and from Mendix without using the import and export mapping.
Below, we will detail how to configure each option for sending data synchronously to Mendix.
3.1 Sending synchronous messages with import and export mapping
To send data to Mendix, you must define several configuration options in the Mendix project. In this example, we will look at the configuration using the import and export mapping in Mendix. In the subsequent paragraph, we will look at configuring the exit if you do not want to use the import and export mapping.
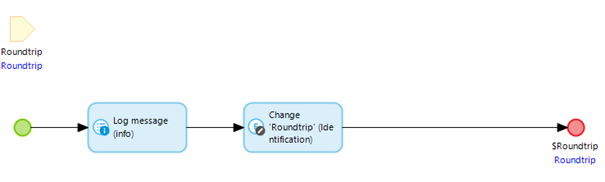
In eMagiz, you will see a flow in Create that you cannot edit, as the autogenerated functionality provided by eMagiz is all you need. Once done, make sure the flow is transported to Deploy and ready to be used in a Mendix application by adding it to a release.
In parallel, earlier or later, the Mendix application needs to be developed to handle the message's consumption and respond to the request with a response mapping. This is done by adding the following configuration to the existing "After Startup" microflow.
3.1.1 Startup action
In Mendix, you must add the "StartSyncMessageConsumer" Java Action to the after startup flow. The most important configuration items here are the following.
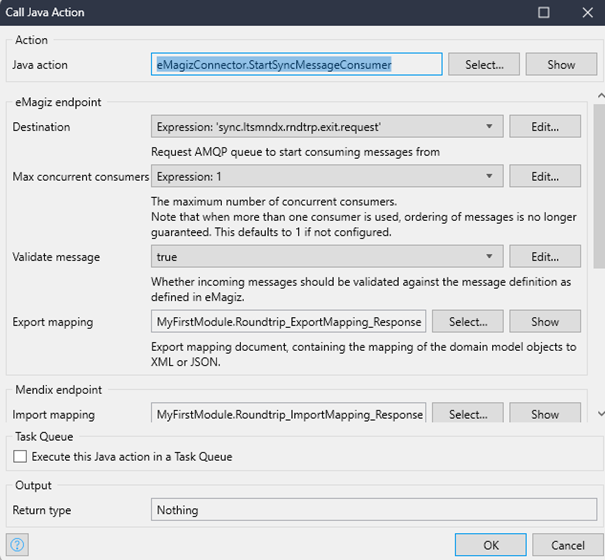
- The destination (i.e., the queue from which you want to consume the request messages). This can be supplied by the eMagiz developer or found under Deploy -> Mendix Connectors should you have access to the eMagiz model in question.
- The export and import mapping (based on the system message definitions). These definitions can be determined by the eMagiz developer (and then shared with the Mendix developer) or determined by the Mendix developer (and then shared with the eMagiz developer).
- The microflow that handles the incoming message and returns a result.
3.2 Sending synchronous messages without import and export mapping
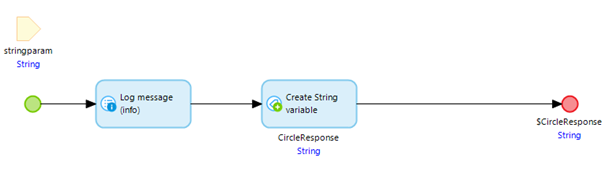
We just saw the example when working with the import and export mapping. Now we turn our attention to an instance without those mappings. In these cases, the string is just passed to the execute microflow, and you can determine in Mendix yourself what to do with it. The same applies to the export part of the logic.
In eMagiz, you will see a flow in Create that you cannot edit, as the autogenerated functionality provided by eMagiz is all you need. Once done, make sure the flow is transported to Deploy and ready to be used in a Mendix application by adding it to a release.
In parallel, earlier or later, the Mendix application needs to be developed to handle the consumption of the message and respond to the request with a response mapping. This is done by adding the following configuration to the existing "After Startup" microflow.
3.2.1 Startup action
In Mendix, you must add the "StartSyncStringConsumer" Java Action to the after startup flow. The most important configuration items here are the following.
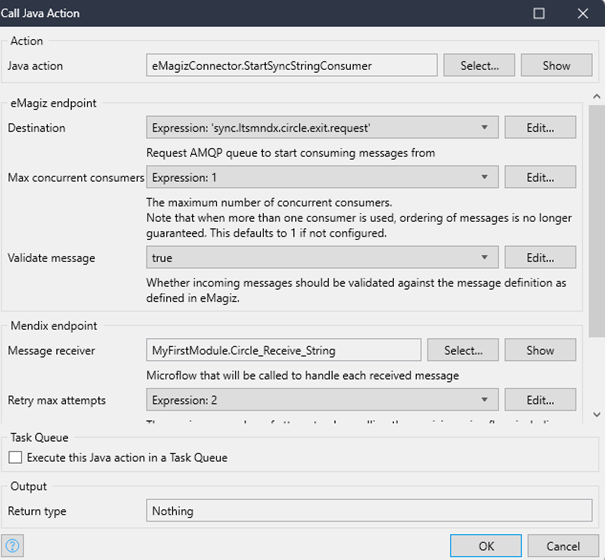
- The destination (i.e., the queue from which you want to consume the request messages). This can be supplied by the eMagiz developer or found under Deploy -> Mendix Connectors should you have access to the eMagiz model in question.
- The microflow that handles the incoming message and returns a result.
4. Key takeaways
To call a synchronous queue in Mendix, you need the following:
- The destination (i.e., the queue from which you want to retrieve the information)
- Execute microflow (the microflow that will process the incoming data)
- Optionally, you can define an import mapping and subsequent options.
5. Suggested Additional Readings
If you are interested in this topic and want more information, please read the release notes provided by eMagiz that accompany the eMagiz Mendix Connector version you have selected. Furthermore, check out these links: