
Configuring Store Items
In this microlearning module, we’ll guide you through the process of configuring store items within the eMagiz platform. You’ll learn how to use the eMagiz wizard to adjust your store items to meet your specific needs. This overview will help you understand how to make the most of the configuration options available to you.
Should you have any questions, please get in touch with academy@emagiz.com.
1. Prerequisites
- Basic knowledge of the eMagiz platform
2. Key concepts
This microlearning centers around configuring store items
With eMagiz Store, we mean: A content library that is available to the community for the selection of re-usable solutions within the eMagiz platform
Within the configuration there are three segments:
- Setup settings
- Setup properties
- Setup resources
3. Configuring Store Items
Now that we have imported our store item it has become time to configure it so it suits our needs. To make this easier for you eMagiz has created a wizard that will guide you through three separate steps (if applicable) as the last phase of importing your store item. These three segments are:
- Setup settings
- Setup properties
- Setup resources
In the remainder of the microlearning, we will discuss each of these segments.
3.1 Setup settings
The first tab will show all settings for components for which you need to consider how you want to use them within your solution. For example, a best practice when calling a REST service is to add a request handler advice chain that consists of a backoff period. In most cases, the advised value for this is 5000 milliseconds (5 seconds). However, there might be valid reasons why you want to deviate from this. As a result, you need to consider settings like these upon importing the store item. Note that when we export we consider which of the settings need to fill in via this wizard and which are not relevant to be considered and touched by a user. Only those settings a user needs to consider are shown in this wizard. If there are no settings a user should consider this tab is not shown.
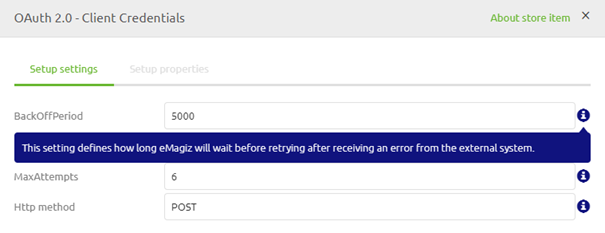
To help you determine what the settings actually mean you can check out the help text that is provided per setting. This alongside the alias should give you enough information to determine if the predefined setting is fine or if it needs some alteration.
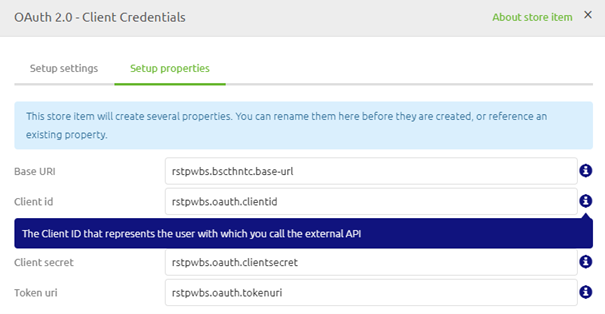
3.2 Setup properties
The second tab will show all property placeholders that will be used within your flow. For example, a best practice when calling a REST service is to use a property to define (parts of) the URL. In this tab, you can rename the property placeholders to your liking. Just as with the setup settings there are also help texts shown in this tab of the wizard. This help text should provide you with some context for what the property is used for. Note that these properties will be available when you create the property via the functionality of the release in Deploy for the deployer. That way the context of what is built is directly transferred to the person that is deploying the latest functionality. Note that when there are no property placeholders needed in a store component the tab would not be shown.
3.3 Setup resources
The third tab will only be shown when there are resources that are missing but are needed to make the store item work. Therefore in most cases this page will not be shown to the user as the relevant resources will be linked to the store item. Note that references to resources in certain components are not automatically recognized and are therefore in need of a change after the import has successfully been finished. An example of this behavior is the SSL reference on the Kafka connection components.
3.4 General
When you have moved through all relevant steps you will see a button that is called Add store item. This will lock your configuration and will make sure that all the components including the changed configuration are applied to your flow. Note that when the name of a channel matches a channel that is already existing in your flow eMagiz will automatically link the two together.
4. Key takeaways
- When importing there might be certain configuration elements that you need to consider and subsequently configure
- Those settings are presented to you via a wizard in eMagiz
- When channels are named the same eMagiz will automatically link up the components