
Hosting a REST web service
Below you will find a document describing the migration path to migrate your hosted REST web service on the runtime level to the latest generation runtime. For the critical aspects of the new generation compared to the current generation, please read this fundamental.
Should you have any questions, please get in touch with academy@emagiz.com.
1. Prerequisites
- Advanced knowledge of the eMagiz platform
- A thorough understanding of your eMagiz model
2. Key concepts
- This migration path allows you to maintain your hosted REST web service in the 3rd generation runtime
- Consequences of this migration are:
- Your all-entry will be split up into separate entries
- HTTP Settings now need to be configured under Deploy -> Architecture
3. Technical Migration Path
As part of the "Transfer Settings from Design" step in the general migration path on migrating to the 3rd generation runtime, you will see an additional option displayed below this option called "Split Combined Entries." After you have migrated your REST web service to the 3rd generation runtime, you will need to split the all-entry directly after the migration is finished.
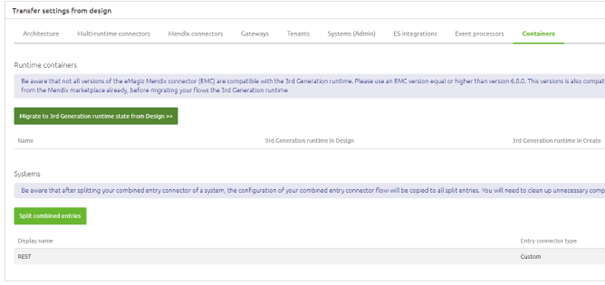
As a result of this step, all shared resources, such as the security, will be moved to the infra flow, and the all-entry will be split into separate entries. Once this is done, you, as a user, need to execute several steps per entry before deploying your solution to any environment.
3.1. Clean up the entries
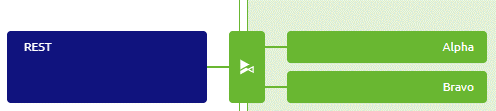
The starting point of our solution, which we are going to migrate, is the following REST web service that has two integrations linked to it.
After eMagiz notifies you that the split of the all-entry was successful, you need to execute some manual actions before adding the new flows to your release. The majority of the manual changes should be performed in each split entry. After migration, each entry will contain all functional components present in the all-entry, as we cannot determine which functional components are needed to handle a specific operation. So for each entry, you need to remove all functional components irrelevant to the operation related to the entry you are currently editing. If you do not do this, the all entry is still in the release.
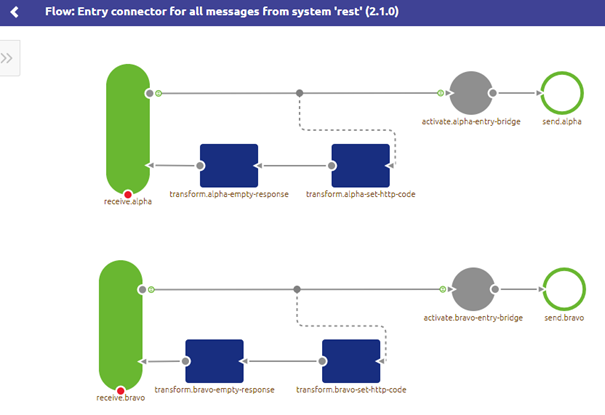
When opening one of the entries after migration, it looks as follows.

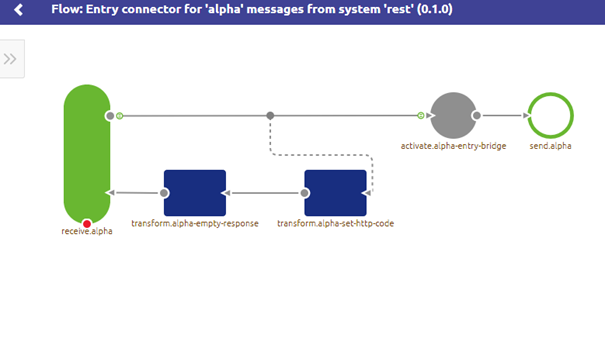
To remove all components that are not relevant anymore in this entry, please enter "Start editing" mode. In this mode, you can remove all irrelevant components from this entry. In this example, all components have something to do with the alpha operation. The result will be something like this.
3.3 Alter the infra flow
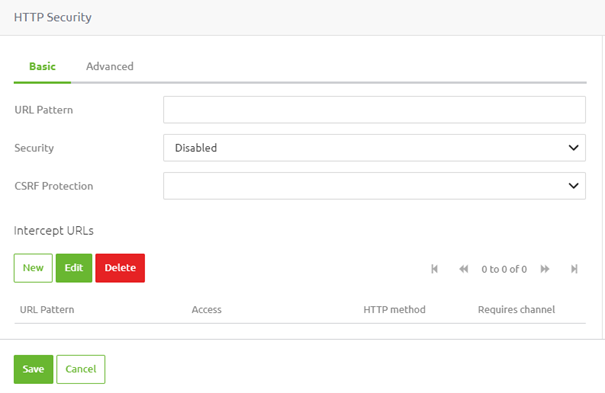
To ensure that the HTTP security in the new 3rd generation runtime works as before you need to add a support object of the type "HTTP Security". In this "HTTP Security" support object you only need to define "Disabled" in the Security drop-down.
3.4 Add the split entries to a release
Now that we are finished in Create, it becomes time to deploy our changes to the Test environment. To add the new flows, particularly the new entries, to your release, you must execute the following steps.
- Create a new release
- Access the context menu and press "Details."
- In the pop-up that follows search for the infra flow of the runtime you are migrating
- Select the latest infra flow of the runtime you are migrating
- As a result, eMagiz will automatically add the split entries to your release and will update the Release overview accordingly
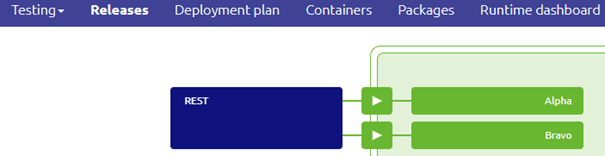
After successfully completing this, the release overview should display the migrated runtime as follows.
3.5 Check the Runtime Settings
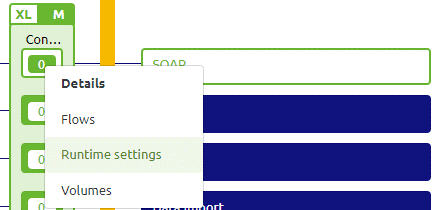
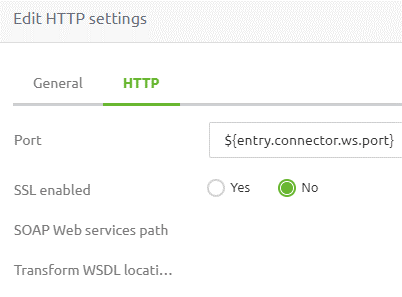
One last step of the migration is to check the runtime settings of the runtime you are migrating under Deploy -> Architecture. This new functionality allows you to define the port on which the REST web service needs to be running (and optionally SSL settings when running it on-premise). You can access these settings via the context menu on the runtime level.
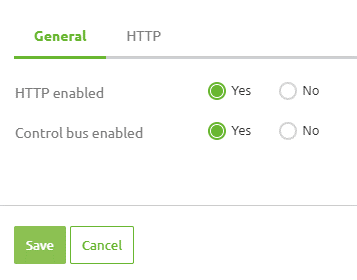
Once you have selected this option, a pop-up will appear, showing you, among others, the HTTP settings. The HTTP enabled option needs to be enabled for a REST web service, and when we look at the advanced tab, we need a reference to the port we will use here (which can be a property reference).
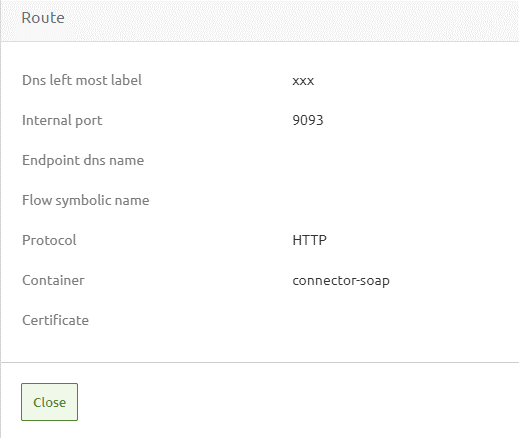
3.6 Check your route settings
For cloud hosted endpoints you are already used to defining a route configuration for your endpoints. With the 3rd generation runtime you also need to do this for your on-premise hosted endpoints. When configuring the route you need to take the following into account:
- The port configured under the route must match the port defined under the Runtime settings configuration
- The DNS left-most label has no effect and can be filled with anything
- Make sure to link the correct container to your route
3.7 Deploy the migrated REST web service to an environment
To deploy this new configuration to your environment, you need to execute step 4.4.2 (Update a subsequent runtime) of the default migration path (or step 4.4.1 should this be your first 3rd generation runtime).
4. Key takeaways
- This migration path allows you to maintain your hosted REST web service in the 3rd generation runtime
- Consequences of this migration are:
- Your all-entry will be split up into separate entries
- HTTP Settings now need to be configured under Deploy -> Architecture