Creating Test Messages for Test Cases
In this module, we’ll explore how to create effective test messages for flow testing in eMagiz. Flow testing ensures that each component of your flow functions as expected by using carefully crafted input and expected outcome scenarios. We’ll guide you through various methods for creating these test messages, helping you to set up robust tests for your flows.
Should you have any questions, please contact academy@emagiz.com.
1. Prerequisites
- Basic knowledge of the eMagiz platform
- Understanding of the Flow testing concept
2. Key concepts
This microlearning centers around the creation of test messages for flow testing.
With flow testing, we mean: Testing each separate component (unit) within the context of a flow based on a supplied input (and an expected outcome).
To create test messages you can use for flow testing in eMagiz we provide you with four options:
- Create a message from scratch
- Create a message based on an example message
- Create message based on eMagiz definition
- Create a message based on an external definition
By choosing one of these options as your starting point you can easily create a test message.
Next, we will explain how you can best use each of these methods to your advantage
3. Creating Test Messages for Test Cases
To create a test message you navigate to the Create phase of eMagiz. Within the Create phase of eMagiz, you open the flow you want to flow test.
After you have opened the flow you should press the button on the bottom bar called Configure tests. This will lead you to the following canvas:
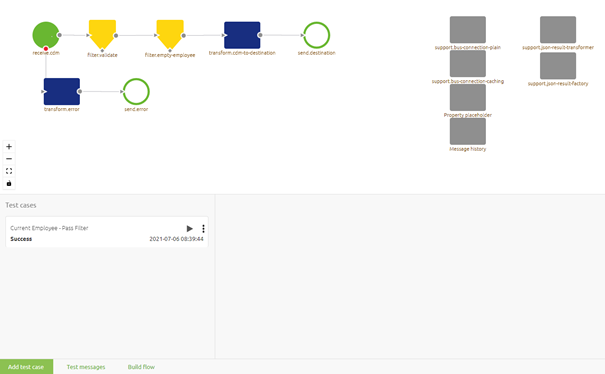
As we learned from our previous microlearning we first need to add (or edit) an test case. While in edit mode on the configure tests canvas you have the option to create messages that can be used within the context of the test case. eMagiz provides you with four distinct options to add/create test messages based on certain elements within or outside the portal. Each of these options is discussed in detail below:
- Create a message from scratch
- Create a message based on an example message
- Create message based on eMagiz definition
- Create a message based on an external definition
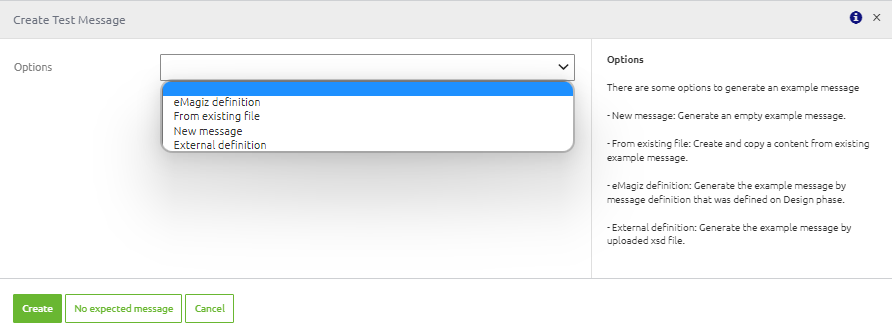
3.1 From scratch
In some cases, you have no information to go on when you want to flow test your flow. In these cases, you can use the option called Empty message.
With this option, you can create a message from scratch.
This means that you have the option to copy-paste or write out your message by hand.
Simply select the option Empty message and press Create. In the pop-up that follows you have to fill in a name (make it clear what the message is about) and fill in the content of the message
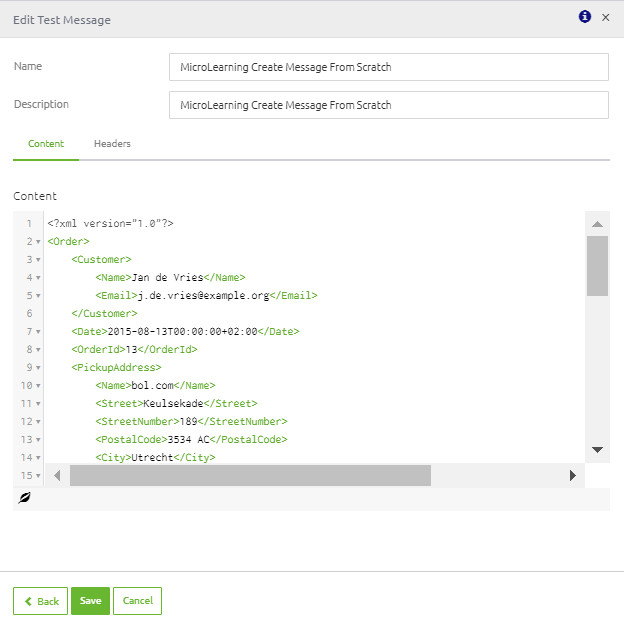
When you are satisfied press Save. If you have doubts about the choice you made press back. If you made a mistake and want to start over again completely press Cancel.
3.2 Based on an example message
Ideally, example messages are known in advance and part of the Discovery.
In eMagiz, there is a centralized place where you store all relevant files and data belonging to integration and that is Capture.
You can also use this place to store example messages you have received from an external source
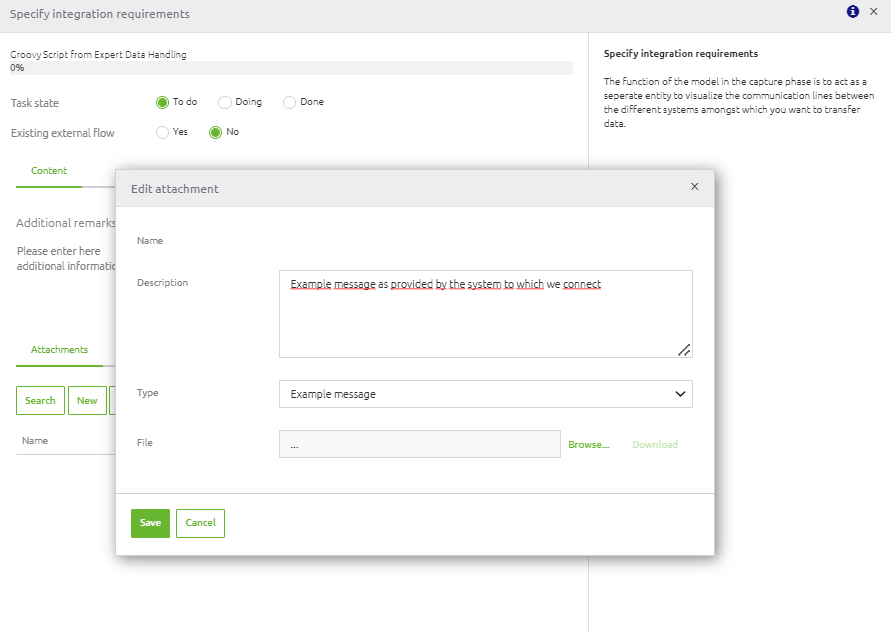
If you have added example messages in Capture or if there are existing messages in Create already you can now use these messages to create test messages for your flow test.
First, select the option From the existing file. Secondly, you have to choose whether you want your input message from Capture or Create
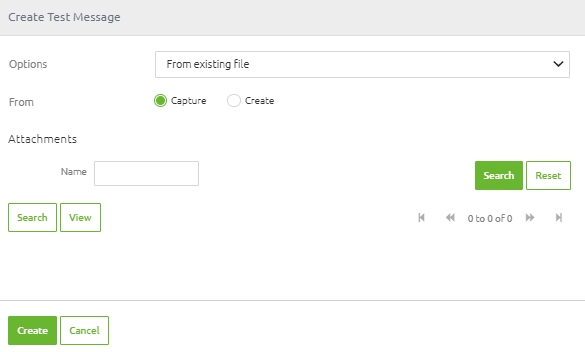
If you choose Capture you can select all example messages you have added to this flow in Capture.
If you choose to Create you can select either all existing test messages attached to the current flow or select existing test messages within your project.
Remember our definition of what a flow test is. Based on that definition it is logical to choose the option Capture.
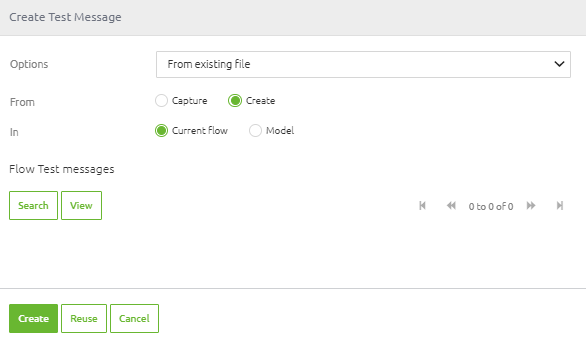
Regardless of the chosen option, the moment you are satisfied with your choice you should select the message and press Select. After you have selected one specific message you press Create.
eMagiz will now create a new test message based on your selection. In the pop-up that follows verify the name (make it clear what the message is about) and check the content.
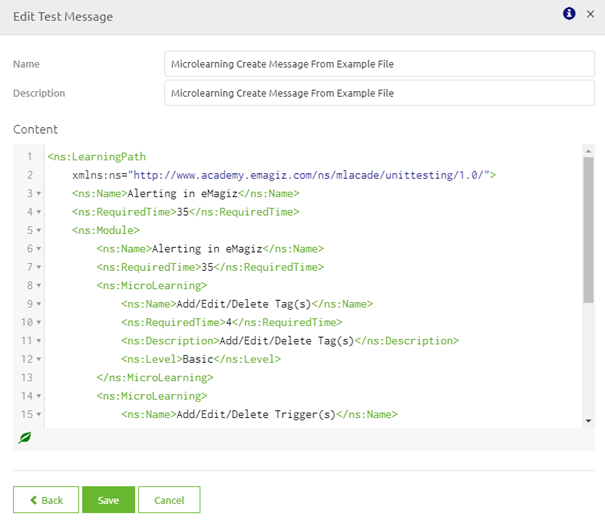
When you are satisfied press Save. If you have doubts about the choice you made press back. If you made a mistake and want to start over again completely press Cancel.
3.3. Based on eMagiz definition
If you have used the eMagiz tooling in Design you have yet another choice to base your test messages on. This option is the option to create a message based on an eMagiz definition.
To start things off let us select the option eMagiz definition.
Within this context, we have to choose whether we want to use an eMagiz definition linked to this flow or one that is linked to the project as a whole.
Remember our definition of what a flow test is. Based on that definition it is logical to choose the option Current flow.
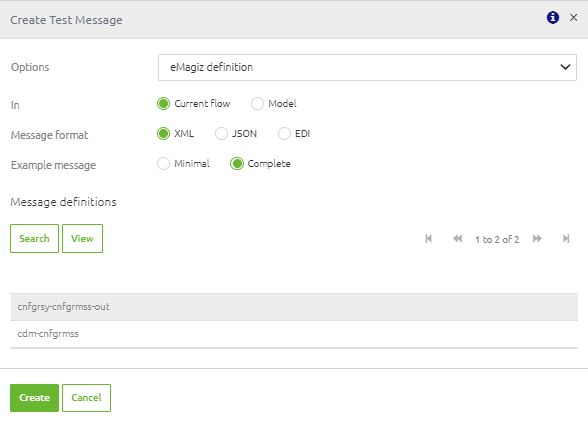
Furthermore, you have to select the correct message format (XML or JSON) and make a choice between Minimal or Complete.
By selecting Complete you get an example message based on all elements and attributes.
If you choose the option called Minimal you get an example message based on all required elements and attributes.
Regardless of the chosen options, the moment you are satisfied with your choice you should select the message and press Select. After you have selected one specific message you press Create.
eMagiz will now create a new test message based on your selection. In the pop-up that follows verify the name (make it clear what the message is about) and check the content.
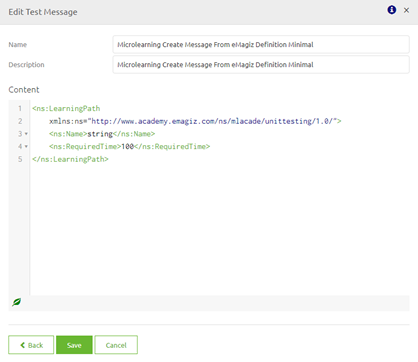
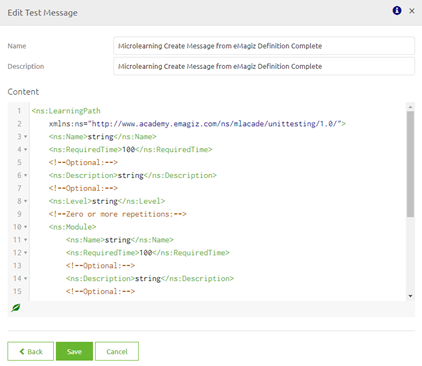
When you are satisfied press Save. If you have doubts about the choice you made press back. If you made a mistake and want to start over again completely press Cancel.
3.4 Based on external definition
If you have an external definition (.XSD) that is not yet attached to Capture nor the basis of an eMagiz definition you have the option to manually upload this definition so it can be the basis of your test message.
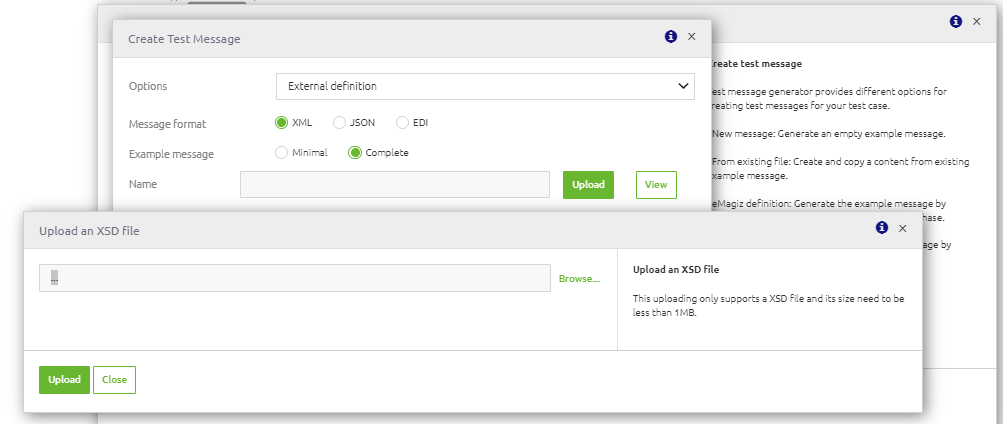
To do so you have to select the option External definition.
Just as with the previous option you have two choices to make before (or after) you upload the XSD. These choices are:
- Defining the message format (XML or JSON)
- Defining whether the example message will only hold the minimal set of required entities and attributes (Minimal) or all entities and attributes (Complete)
Regardless of the chosen options, within this context, you have to press the Upload button and select the file you want to Upload.
After you have successfully uploaded the file you can either view the message so you can verify that you have uploaded the correct definition or press Create
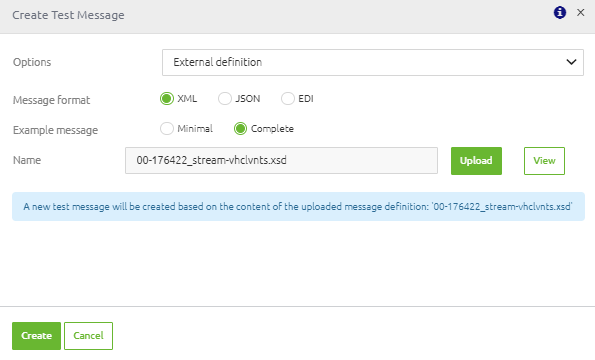
After you press Create eMagiz will create a new test message based on your selection. In the pop-up that follows verify the name (make it clear what the message is about) and check the content.
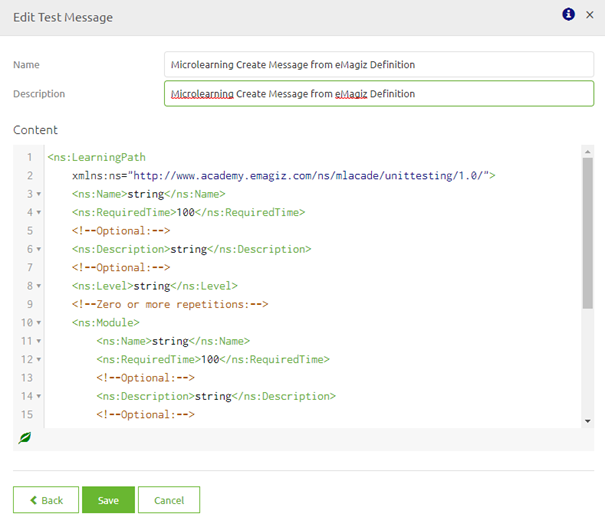
When you are satisfied press Save. If you have doubts about the choice you made press back. If you made a mistake and want to start over again completely press Cancel.
4. Key takeaways
- To create test messages you can use for flow testing in eMagiz we provide you with four options:
- Create a message from scratch
- Create a message based on an example message
- Create message based on eMagiz definition
- Create a message based on an external definition
- By choosing one of these options as your starting point you can easily create a test message.
