Certificates
In a previous microlearning, we explored the fundamentals of certificates and their role in securing data traffic. In this microlearning, we will dive into the practical steps for configuring a certificate and linking it to a route within the eMagiz Cloud. As a best practice, we secure hosted web services within the messaging engine with a certificate. This process ensures that only clients presenting a valid certificate can access your web services. We’ll guide you through setting up the certificate on the Cloud level and highlight key practices for effective configuration.
Should you have any questions, please contact academy@emagiz.com.
1. Prerequisites
- Basic knowledge of the eMagiz platform
- Basic knowledge of cloud management
2. Key concepts
This microlearning centers around certificates.
- With certificates, we mean: A trustworthy document that is interchanged between parties to verify that both parties are who they claim to be.
It is a best practice to either secure your web service with the help of OAuth2.0 (note this only works for REST) or with a combination of API-Key and certificate (works for both SOAP and REST).
3. Certificates
In this microlearning, we will focus on the action to configure a certificate and link it to a route. As a best practice, we secure hosted web services within the messaging engine with a certificate. In the previous microlearning, we learned about routes. Now we will focus on the certificate part.
It is a best practice to either secure your web service with the help of OAuth2.0 (note this only works for REST) or with a combination of API-Key and certificate (works for both SOAP and REST).
In this microlearning, we will focus on the latter of the two options and focus specifically on the configuration that is needed on the eMagiz Cloud level to ensure that only clients that can provide a valid certificate are given access to the web service.
Important things to remember are:
- Configuration on eMagiz Cloud level is done via Deploy -> Architecture
- Certificate is generated via the support department (with or without CSR)
- No actions are needed on flow level, only on Cloud level
- All you need for the configuration is the common name of the certificate
Now that we have introduced the topic let us see how to configure the certificate within Deploy -> Architecture. The first step is to open the Deploy phase of the project for which you want to configure the certificate. After that, you need to select the correct environment (TAP). In this environment open the Architecture page. On this page, you can manage everything related to the eMagiz Cloud.
Among others, you can also configure your certificates. To do so open the context menu via a right-mouse click on the whitespace alongside your landscape overview. Note that you need to be in "Start Editing" mode to configure certificates.
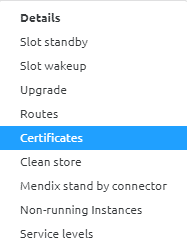
In the pop-up that follows press New or Edit (in case you want to change an existing certificate configuration). In this microlearning, we use the option New. The following pop-up will be shown:
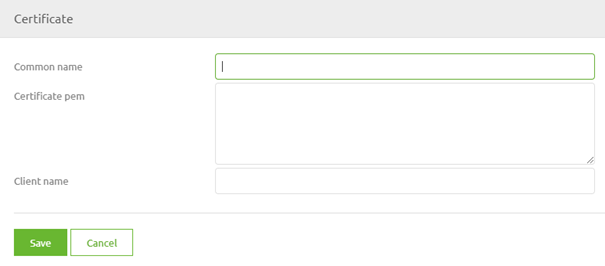
In this pop-up, you enter the Common Name (as received from Support) and a Client Name (can be anything you like). The result should be something as follows:
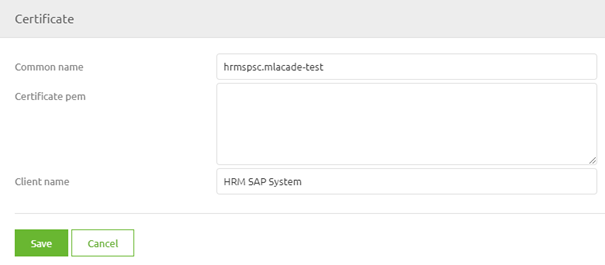
The moment you are satisfied with your result press Save. Close the other pop-up and open the context menu again. This time select the option Routes. For this example, we assume the route already exists.
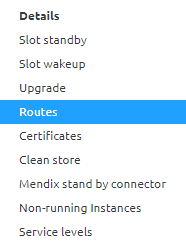
Select the route that belongs to the runtime in which you are hosting the web service and press Edit.
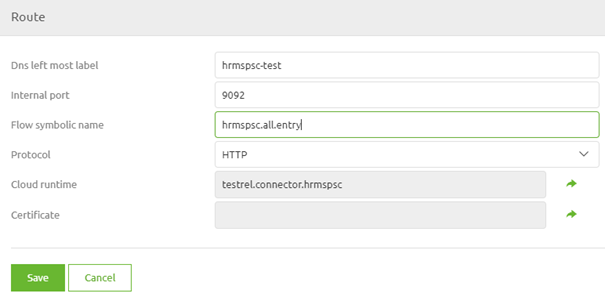
In here click on the icon on the right of the certificate entry and select the correct Certificate in the pop-up that is presented. After you have selected it eMagiz will automatically link the certificate to the route as shown below.
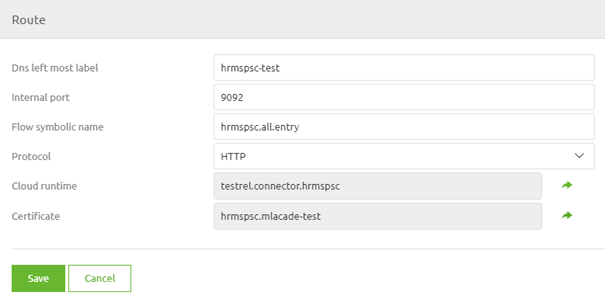
When you are content press Save. The only thing left to do after this is to actualize the changes in the eMagiz Cloud. You can do so by pressing the Apply to environment button (more on that in the following microlearning). Note that this button will apply all changes so in case of others have also made changes these will also be automatically changed in the eMagiz Cloud. So always think before you act.
4. Key takeaways
- Set up certificates within eMagiz Cloud under Deploy -> Architecture, and ensure certificates are properly linked to routes to control access securely.
- As the security best practices, for REST services, use OAuth2.0; for both SOAP and REST, combine API-Key with certificates for robust security.
- Use the "Apply to environment" button carefully to apply changes across configurations, avoiding unintended impacts.
- Restarting runtimes will reset all flows, including infrastructure, to their initial state, so plan and execute with precision.
5. Suggested Additional Readings
If you are interested in this topic and want more information, please read the help text provided by eMagiz and see the following links:
