
Merge Store Data Model
In this microlearning session, we'll explore how to use the eMagiz Store's merge functionality to import message mappings and transformations into your data model. The eMagiz Store offers a content library with reusable solutions that can be seamlessly integrated into your projects. As we build on the knowledge from previous sessions, you'll learn how to merge store data models with your own, ensuring a smooth integration process. This session will guide you through the steps and provide key insights into the merge tool and its impact on your design and create phases.
Should you have any questions, please get in touch with academy@emagiz.com.
1. Prerequisites
- Basic knowledge of the eMagiz platform
2. Key concepts
In this microlearning, we will learn how to import message mappings and transformation with the help of the store merge functionality. With eMagiz Store, we mean a content library available to the community to select re-usable solutions within the eMagiz platform.
- To import a store item in Design, you need to follow the import wizard
- When importing in Design, you can import the message definition, data model message, transformation, and accompanying flow fragments
- For more info, see the previous microlearning.
- When importing the data model message or transformation, you will need to merge the store data model with your data model
3. Merge store data model
In our previous microlearning, we learned how to select a store item that we could import into Design. In this microlearning, we will build on this knowledge to learn how you can merge the store data model message with your own data model message.
In the previous microlearning, we learned that you have three options to import content from the store. If you have selected the transformation or data model option, you will have to merge the store data model with your data model.
Once you have selected the store item of your liking you can import it via the import process described in the previous microlearning.
When selecting such a store item, you will see additional options in the pop-up after choosing the correct version. See below for an example.
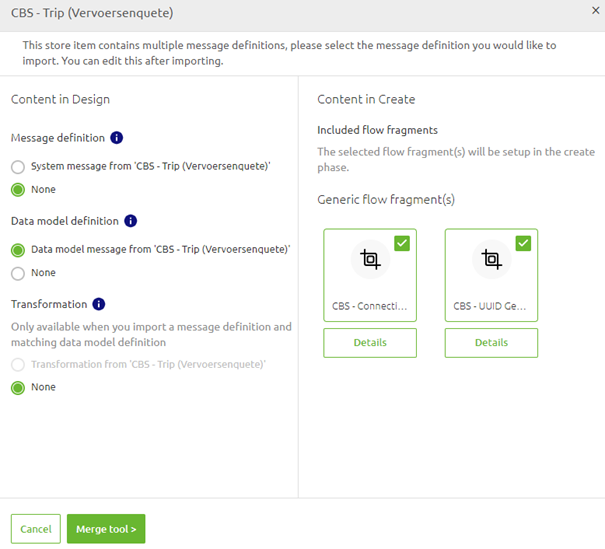
As you can see, you have a button called Merge tool at your disposal. Pressing this button will lead you to the merge functionality, which will allow you to merge the store data model with your data model.
3.1 Merge Tool
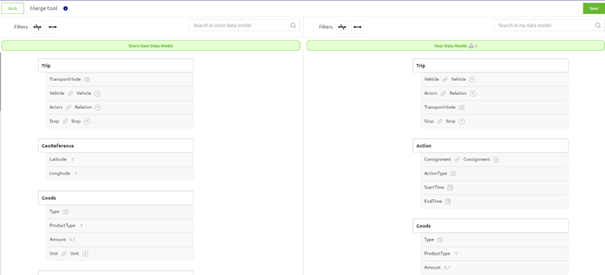
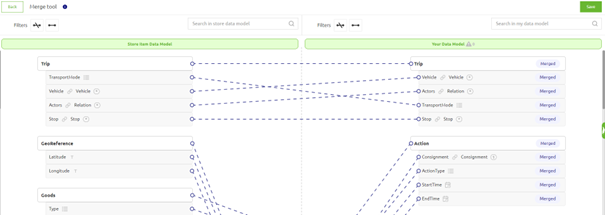
This functionality resembles what you already know from a regular transformation from a system message to a data model. In this functionality, you can draw lines from the store data model (on the right-hand side) towards your data model (on the left-hand side). By drawing a line, you indicate that a specific entity or attribute needs to be merged in the store data model.

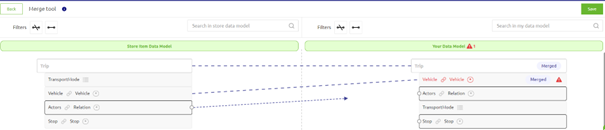
eMagiz will inform you when you draw lines from the store to your data model whether a specific action will cause an error, as shown below. On top of that, eMagiz also indicates which lines you can draw from the store to your data model by highlighting the available options in your data model when you start drawing a line from the store model. This behavior is indicated below.
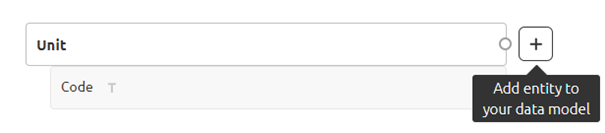
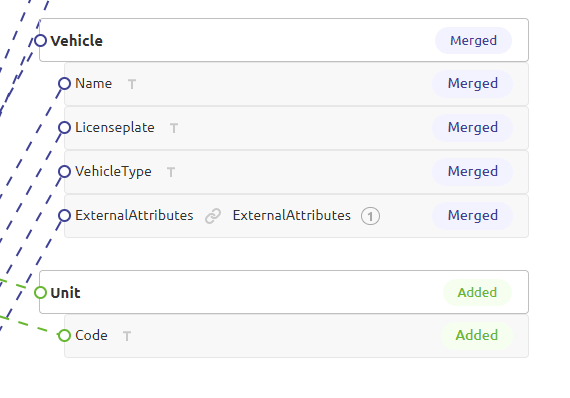
On top of drawing lines from the store to the data model, you can also add entities and attributes from the store data model to your data model. You can do this if your data model message does not yet have an entity or attribute that fits the information in the store model. For example, you can click on the + icon next to an entity or attribute. Note that when you add an entity, you automatically add the underlying attributes.
When drawing lines or adding entities and attributes, eMagiz will keep you updated on what you merged and added to your data model.
With this set of functionalities at your disposal, you can merge every bit (that you want) of the store data model message to your data model message. See below for an example of what the result could be.
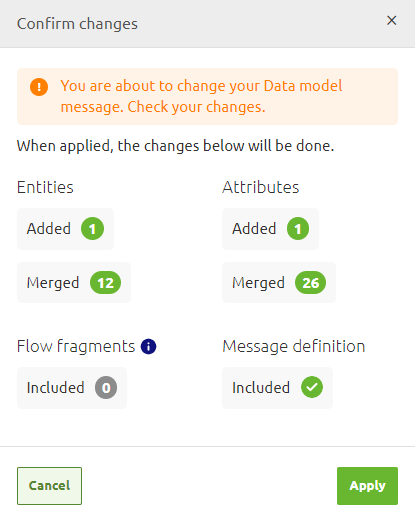
When satisfied with the result, you can press Save to save your merge and let eMagiz import the data model and possibly the transformation and message definition. Then, when you press Save, eMagiz will summarize the changes it will process and ask for confirmation of the action via a confirmation pop-up. Then, simply press Apply and let eMagiz do the work.
3.2 Example result
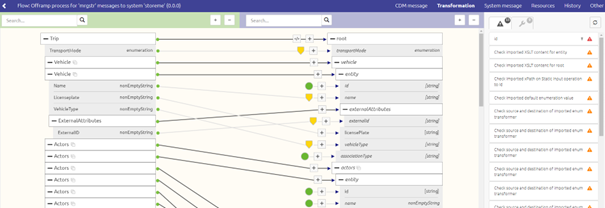
Depending on what you are importing, the result will differ. For example, when you only import a data model message, only the data model and the data model message will be impacted. However, when you import a transformation, eMagiz will merge the store data model with your data model, import the message definition of the system and create the message mapping and transformation for you. See below for an example of a message mapping result.
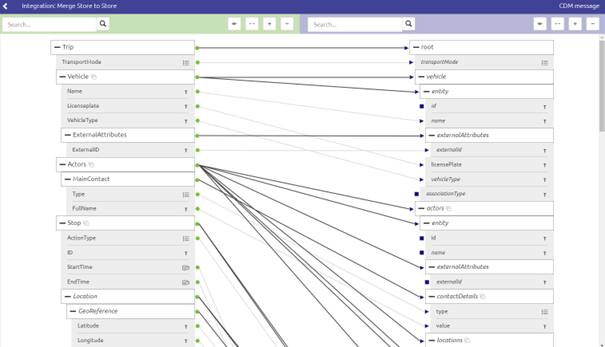
Note that when you do not merge specific attributes and entities, eMagiz will show warnings on the message mapping level. These warnings are displayed to inform you that particular information elements were not imported and could be lost if you do not take action. Subsequently, eMagiz will show warnings on the Create level for all parts of the transformation that you need to verify to ensure they will work properly.
3.3 Current Limitations
- When the datatype of an attribute is incompatible, you cannot merge the attribute from the store to the attribute in your data model
- You can only draw one line between an entity from your store data model and your data model
- You can only merge attributes between the store and the data model on the same level. So you can merge Trip/ID with Trip/ID, but you cannot merge Trip/ID with Trip/Action/ID
3.4 Effect in Create
Once you have transferred the solution to the Create phase and open the relevant flow for which you have imported the store item, you can navigate to the transformation. Within the transformation screen, you will see everything eMagiz has imported for you and all things you still need to check and validate before testing your solution with the help of flow testing.
4. Key takeaways
- When importing a data model message or transformation, you will need to merge the store data model with your data model
- eMagiz will provide feedback while you are performing the merge between the store and your data model
- Once you have defined a link between certain entities and attributes from the store data model to your data model, eMagiz will re-use them when you import a different store item using (parts of) the same-store data model message
- The merge functionality has some current limitations that you should take into account when using the functionality