
Dynamic Alerting
In this microlearning, we'll dive into configuring dynamic alerting in eMagiz. Dynamic alerts allow you to set up notifications based on specific triggers you define, helping you stay on top of critical events in your integration landscape. You can create alerts for error messages, log messages, topic updates, and consumer lag, and customize who gets notified. We’ll walk you through the different types of triggers and how to set them up effectively. Should you want to learn more about the standard alerting that eMagiz offers, please check out this microlearning.
Should you have any questions, please contact academy@emagiz.com.
1. Prerequisites
- Basic knowledge of the eMagiz platform
2. Key concepts
This microlearning centers on configuring dynamic alerting based on triggers you can define as a user.
By defining, we mean: Specifying based on what triggers an alert needs to be raised.
- There are three trigger options
- Log message
- Messages added to topic
- Topic consumer messages behind
- On the trigger level, the recipients are defined
3. Dynamic Alerting
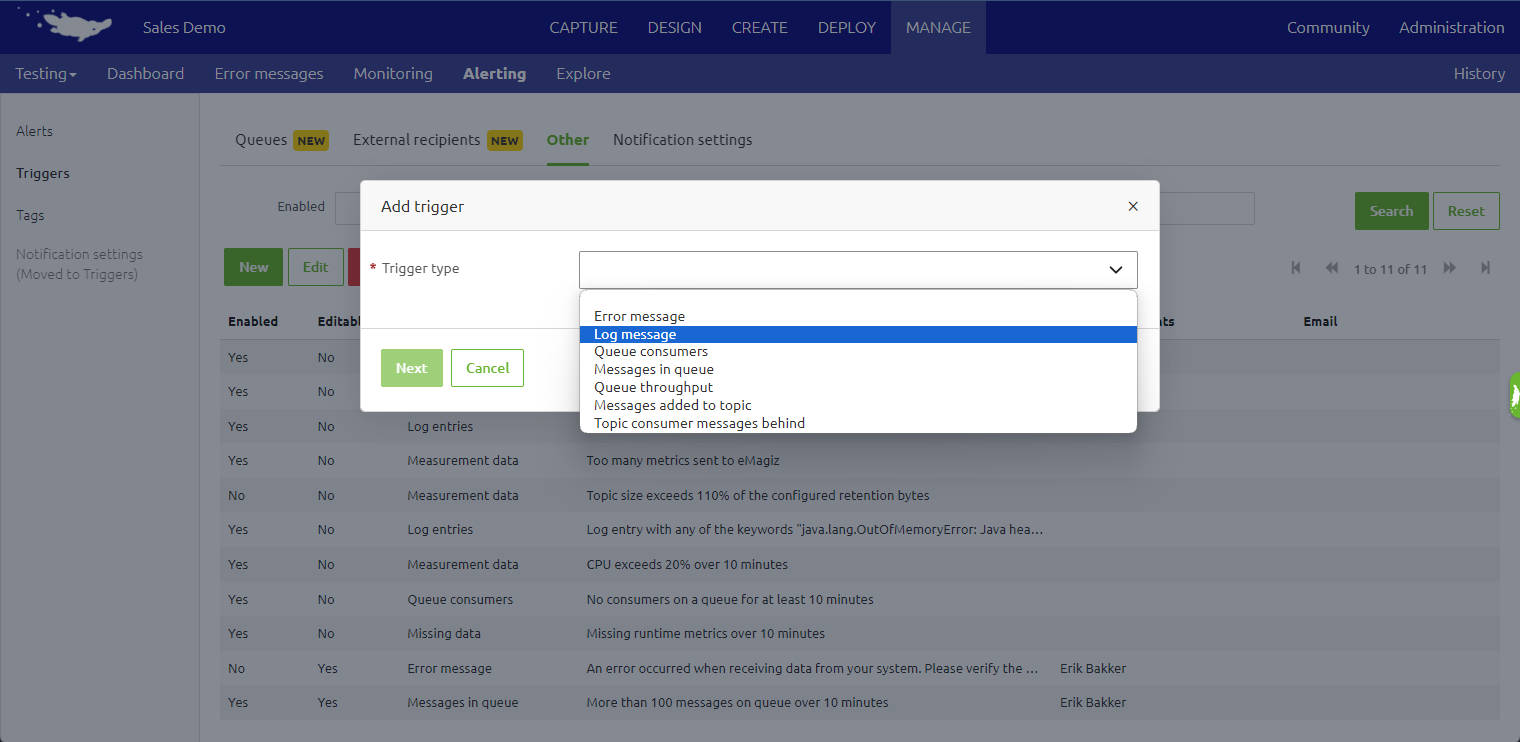
To enhance the observability of your integration landscape while running in the current generation architecture, we provide a functionality in the Manage phase called "Dynamic Alerts". You can access this functionality via the "Alerting" menu in Manage. Then, with the help of the "Trigger" overview, you can view all triggers in your environment. From there on, you can navigate to the "Other" tab.
Here, on the top of the list, you will see all "static" alerts that are defined by eMagiz (alerts that are non-editable) and below that (alerts that are editable), you will see all "dynamic" alerts that you and your fellow team members (with sufficient rights) can view, edit and delete.
In this page, we offer dynamic alerting on three different types.
- Log message
- Messages added to topic
- Topic consumer messages behind
First, we will discuss the configuration of each trigger type. Subsequently, we will discuss defining which recipients will be notified and how to alter the default congestion control settings (as this is the same for each trigger type).
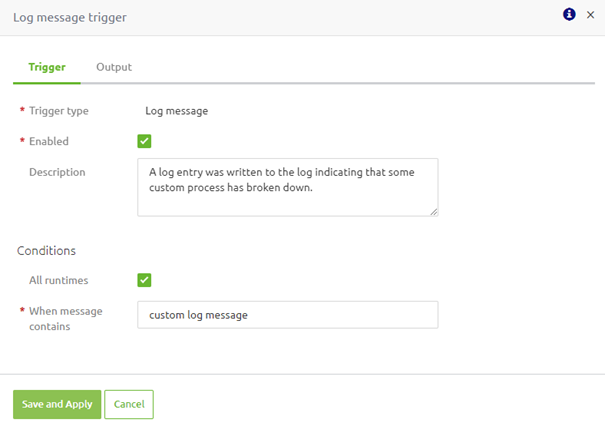
3.1 Log message
On top of the "static" alert that is autogenerated by eMagiz on Log messages, you can add additional "dynamic" alerts that only trigger when a log message contains a specific phrase. This is likely when you log something on which you want to alert when it happens.
To define the trigger, fill in the phrase you want to check. On top of that, you can fill in a description that will be added to the alert received via email. Once this is filled in, the configuration could look as follows.
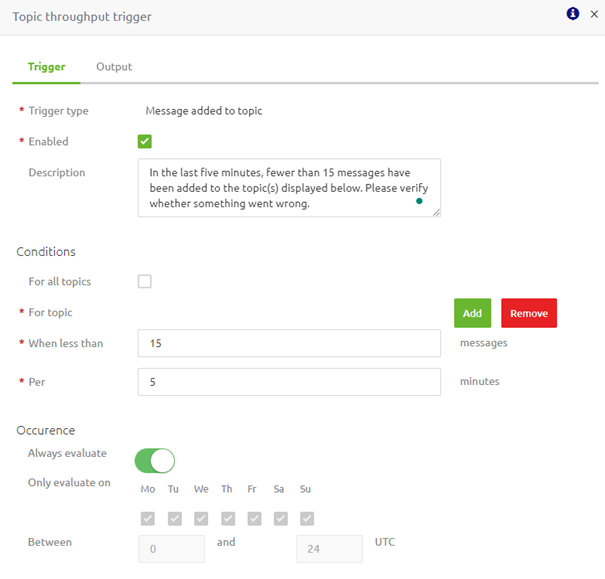
3.2 Messages added to topic
For this category, you can add additional "dynamic" alerts. These alerts only trigger when the messages added to one or more topic is less than X messages per Y minutes. On top of the number of messages (X) and the timeframe (Y), you can define whether to validate this on a specific topic or all topics. Note that the default configuration is that the alert applies to all topics. You can uncheck the checkbox to check on a specific (set of) topic(s). As a result, the "Add" and "Remove" buttons are displayed by eMagiz, through which you can add and remove topics to the trigger.
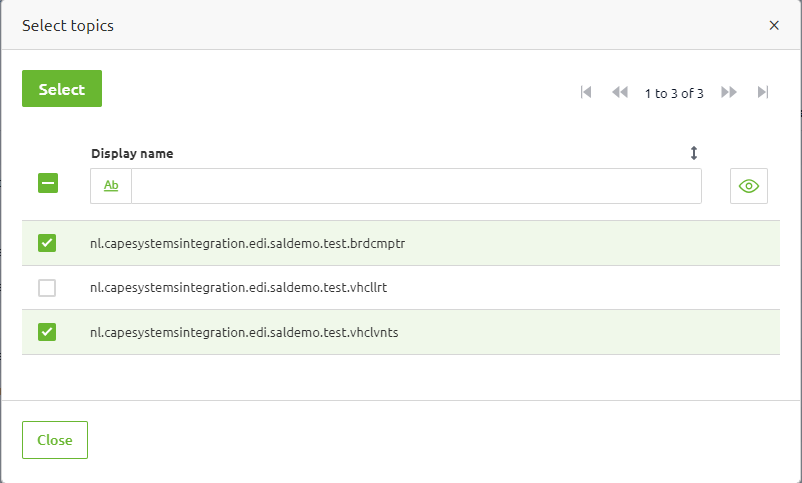
When you press the "Add" button, a new pop-up will appear through which you can select the topics for which you want the trigger to be activated. In this pop-up, you can choose one (or more) topics and press the "Select" button to add them to the trigger. Once you have selected the topic(s) and pressed "Select," eMagiz will close the pop-up and add the topics to the trigger.
For this trigger, additional criteria can be configured that allow you to define when eMagiz needs to validate this configuration (i.e., Occurence). With the help of this configuration option, you can specify when the trigger needs to be evaluated. An example could be only on Monday between 04:00 AM and 05:00 AM.
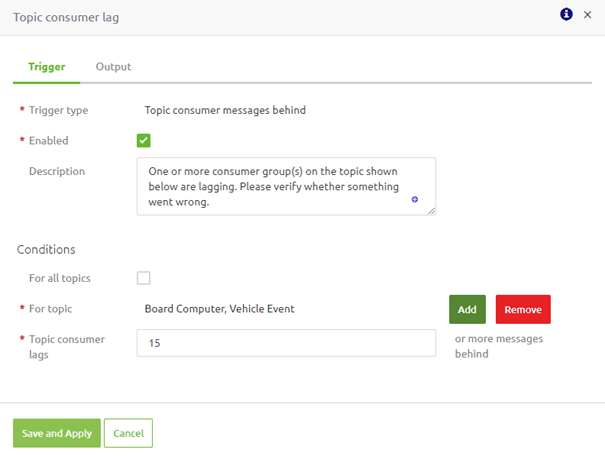
3.3 Topic consumer lag
For this category, you can add additional "dynamic" alerts. These alerts only trigger when one (or more) consumer groups lag by X messages on one (or more) topic(s). Note that the default configuration is that you, as a user, need to specify for which topic(s) the alert applies, as consumers' behavior can vary widely.
Once filled in, the solution should look similar as follows.
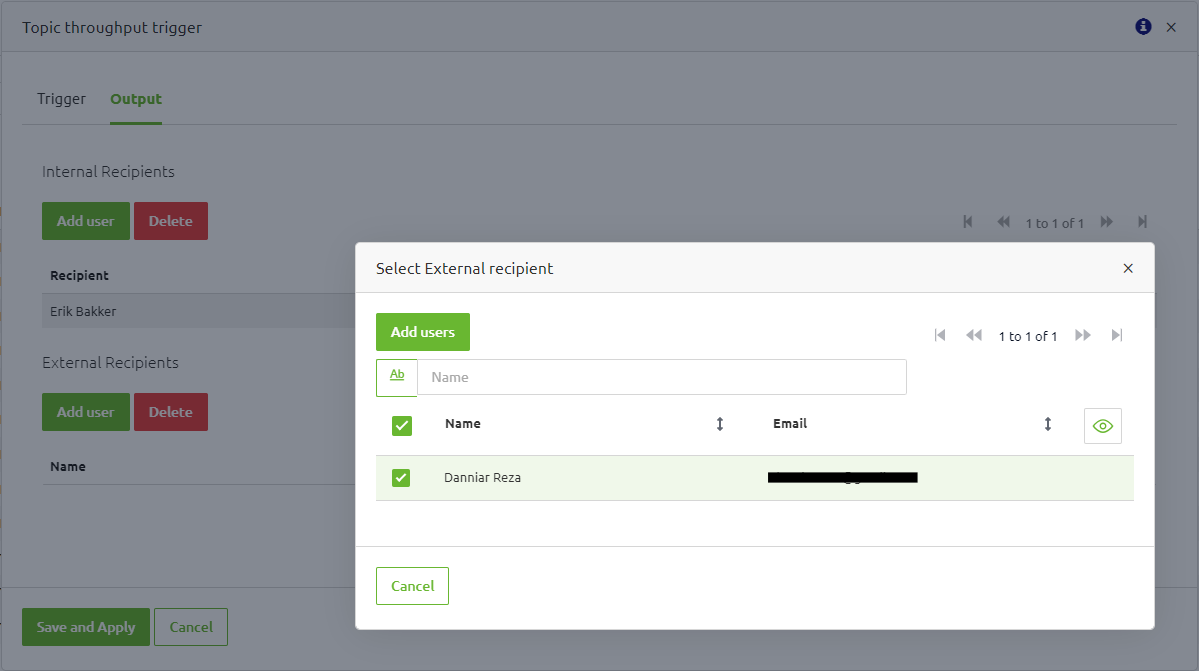
3.4 Recipient(s) configuration
You can select your recipients when you switch from the "Trigger" to the "Output" tab. In this overview, you can choose both internal recipients (i.e., eMagiz users that is part of your company or has access to the model in question) and external recipients.
4. Key takeaways
- There are three trigger options that eMagiz provides for dynamic alerting:
- Log message
- Messages added to topic
- Topic consumer messages behind
- On the trigger level, the recipients are defined.
- When entering multiple external recipients for these dynamic alerting triggers, ensure that you have listed them in the Manage->Alerting->Triggers->Notifications settings tab.